1. Introduction
We would like to thank you for choosing Blogar.
Blogar is a premium and trendy blog, Magazine, and Blog Theme with super flexibility and fully responsive design. It is a perfect fit for Blog, Magazine, News Agencies, Travel & Tour Agencies, Business Magazines, Food, Lifestyle Brands, and Technology News websites. It is also suitable for any publishing or review websites that require a sleek, modern, and clean look.
Blogar is also made with UI/UX in mind. The easy-to-navigate features means your users will always be able to find what they are looking for with much fewer clicks. Bold and bright color combinations also ensure that each page is unique, helping your desired content stand out from the rest. Blogar is a product of Axilweb Limited.
1.1. Requirements
There are system requirements in order to install and setup Blogar theme and its components properly. Make sure that you are running the latest version of WordPress, PHP version 5.6 or higher and MySQL version 5.6 or higher. We also recommend the following PHP configuration limits.
Recommended PHP configuration limits
- upload_max_filesize = 32M
- post_max_size = 32M
- max_execution_time = 300
- max_input_time = 300
- memory_limit = 256M
1.2. What's Included
After purchasing Blogar theme on themeforest.net with your Envato account, go to your Download page. You can choose to download Blogar theme only (Installable WordPress Theme) or the entire Blogar theme package which contains the following files:
- Blogar theme: An Installable WordPress Theme zip file.
- Blogar child-theme: A child-theme zip file and a readme.txt note about the child-theme.
- Documentation: A link to this documentation.
- Licensing.
2. WordPress Installation
Please follow the instructions in the video to see how you can install WordPress on your hosting:
- For local host: https://www.youtube.com/watch?v=snFzbPm_RUE
- For cPanel: https://www.youtube.com/watch?v=t-YBqV2ReR0
3. Upload and Activate Theme
When you are ready to install a theme, you must first upload the theme files and then activate the theme itself. The theme files can be uploaded in two ways:
How to Setup and Demo Import (Video): https://youtu.be/ClCmn8ueYp0
Create Home Page Like Demo Without Demo Import (Video): https://youtu.be/albB011W8lg
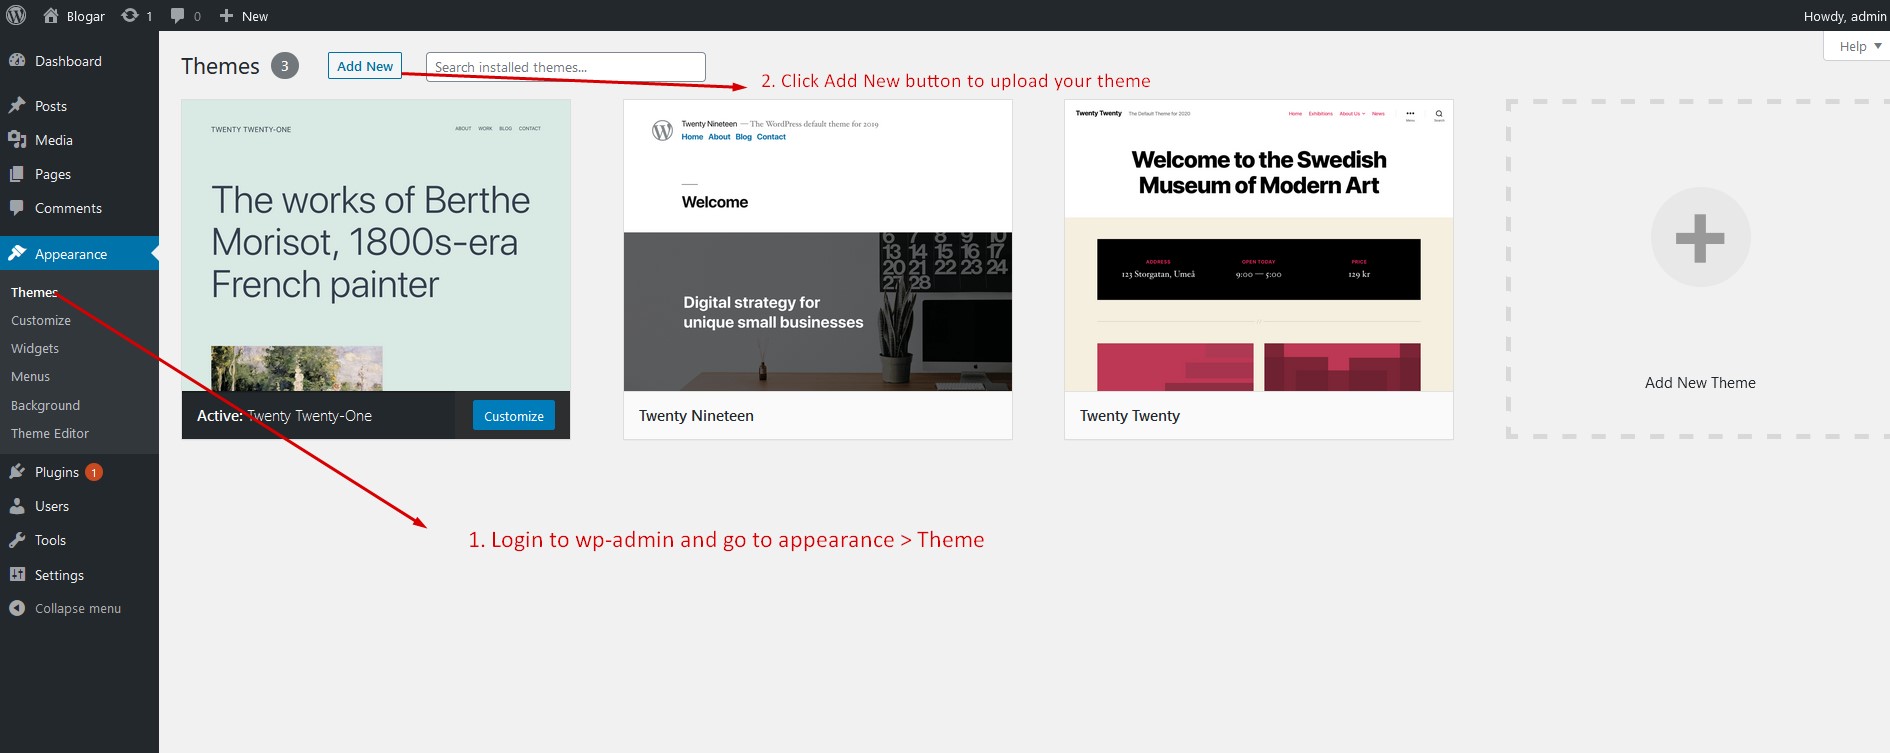
3.1. Using Theme Uploader
Follow the steps as instructed in the images below:


3.2. Using FTP Clients
Follow the following steps to upload your theme using FTP clients:
- Use an FTP such as FileZilla and go to your WordPress installation director
- Navigate to /wp-content/themes/ folder and upload the theme folder ther
- Log in to your WP Admin Dashboard and open the 'Appearance / Themes' menu
- You will now see Blogar Theme listed among the other themes. Click on activate and you’re done!
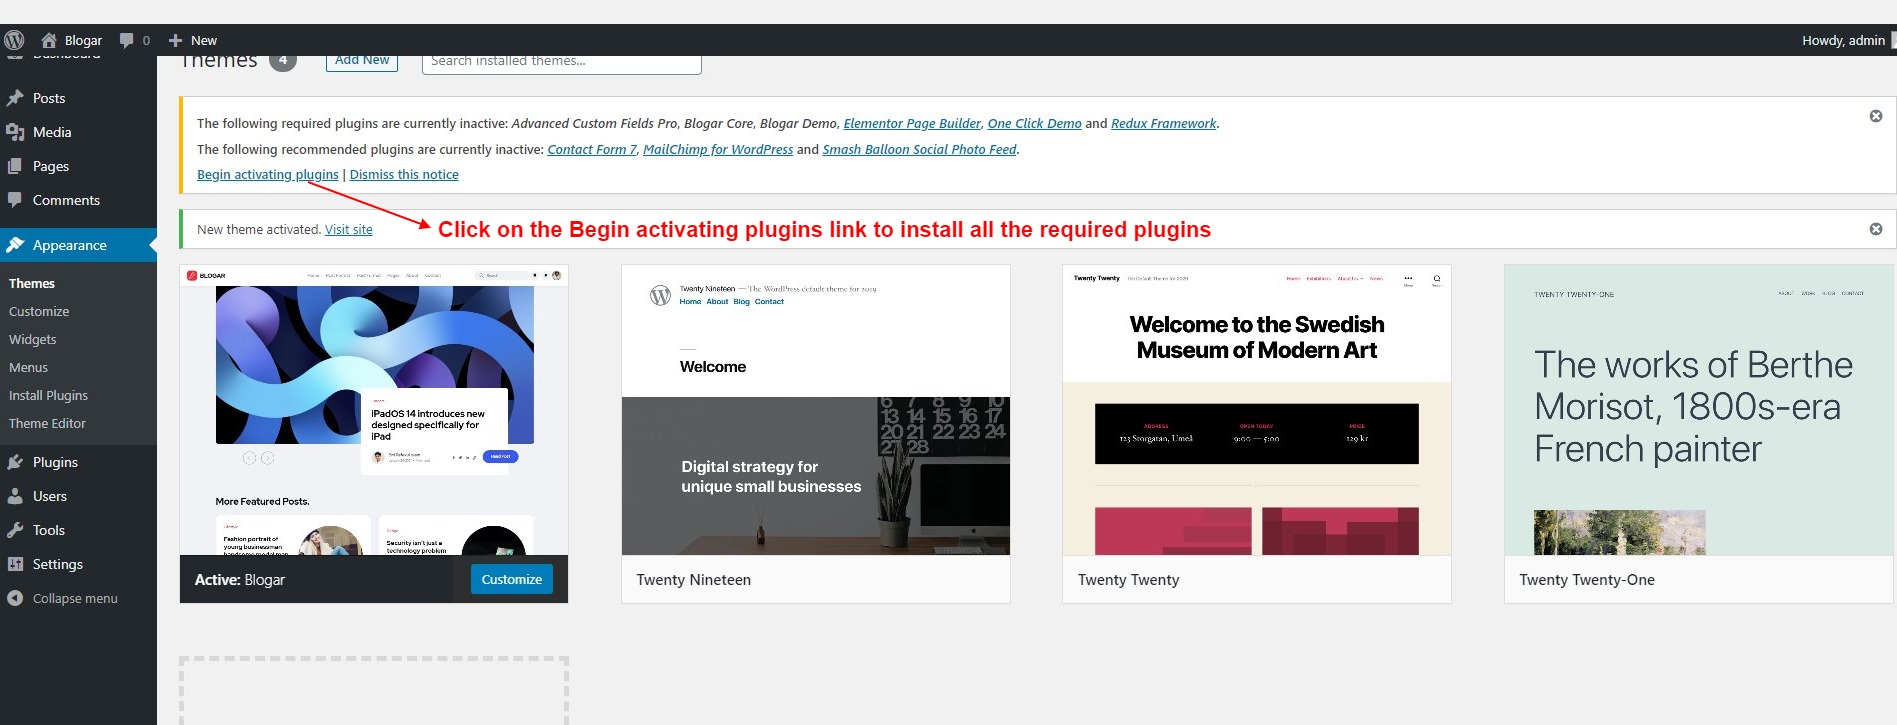
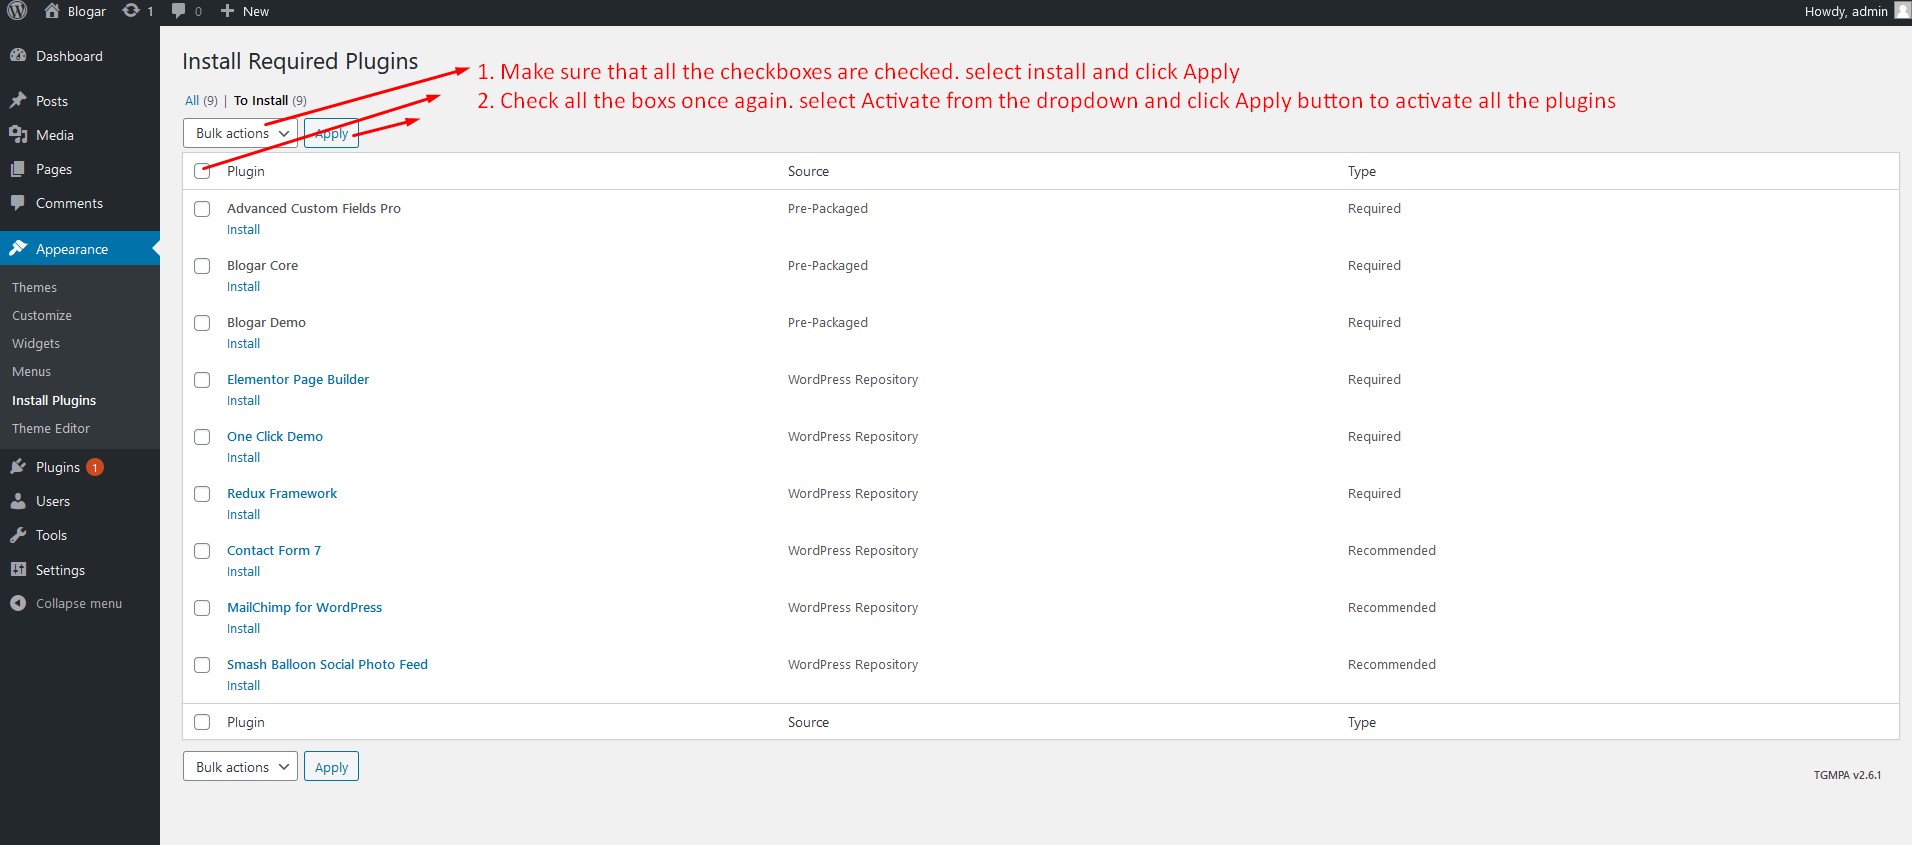
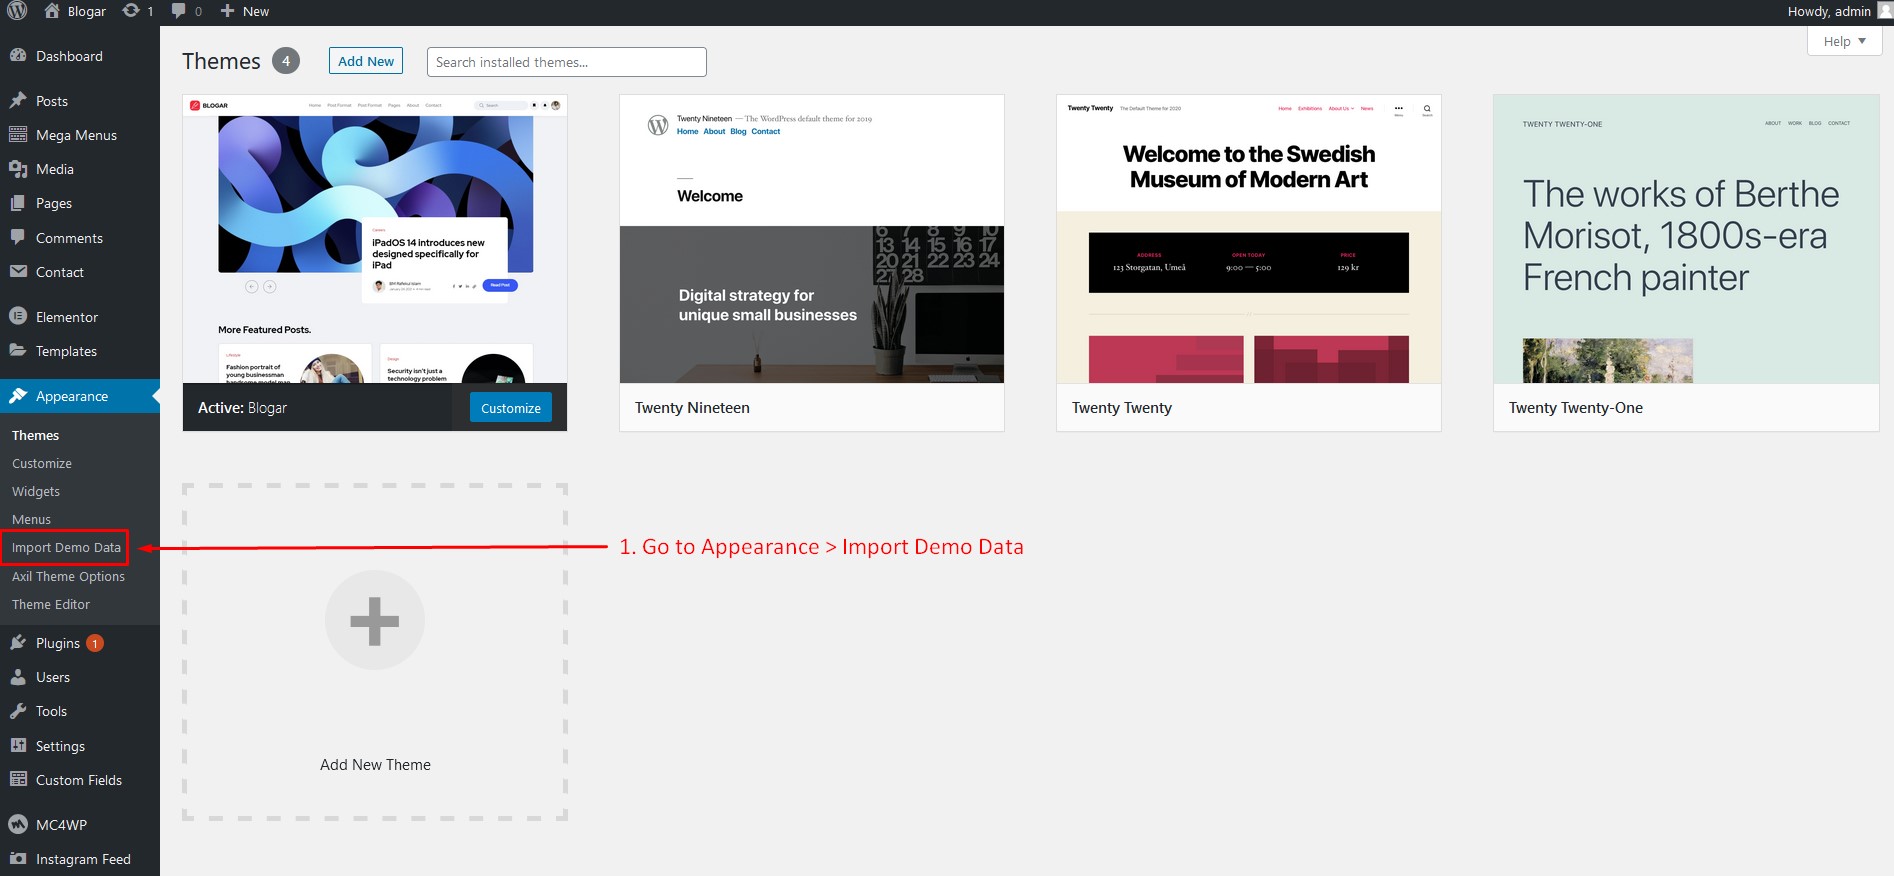
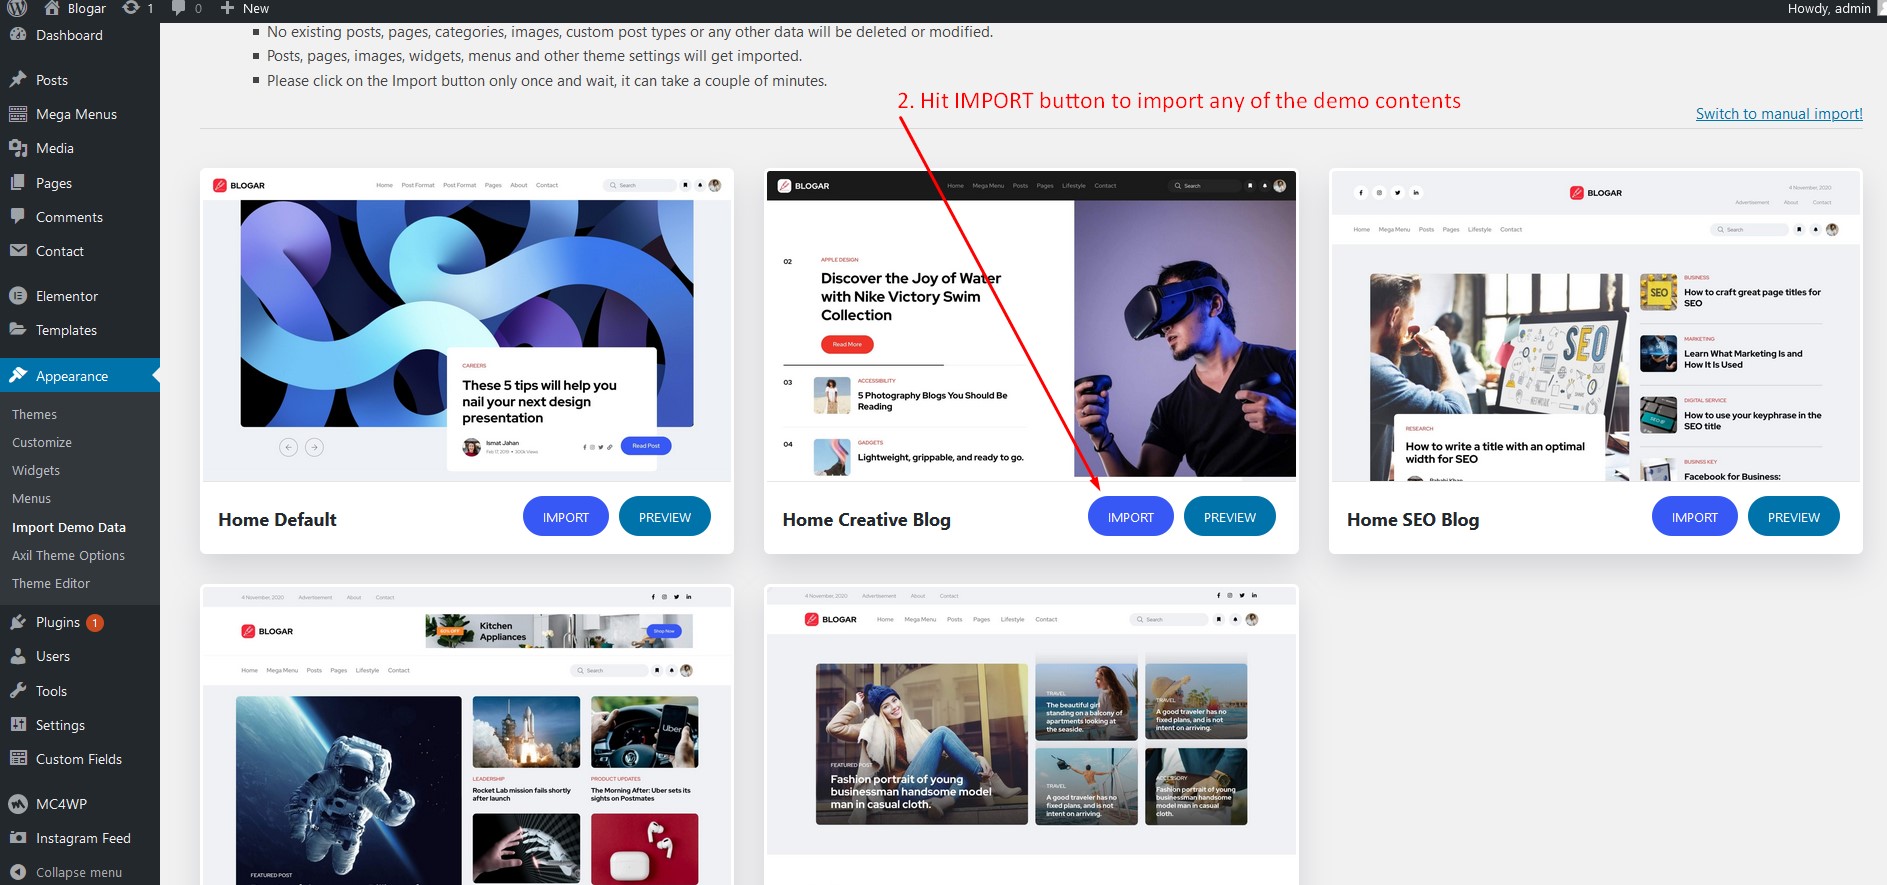
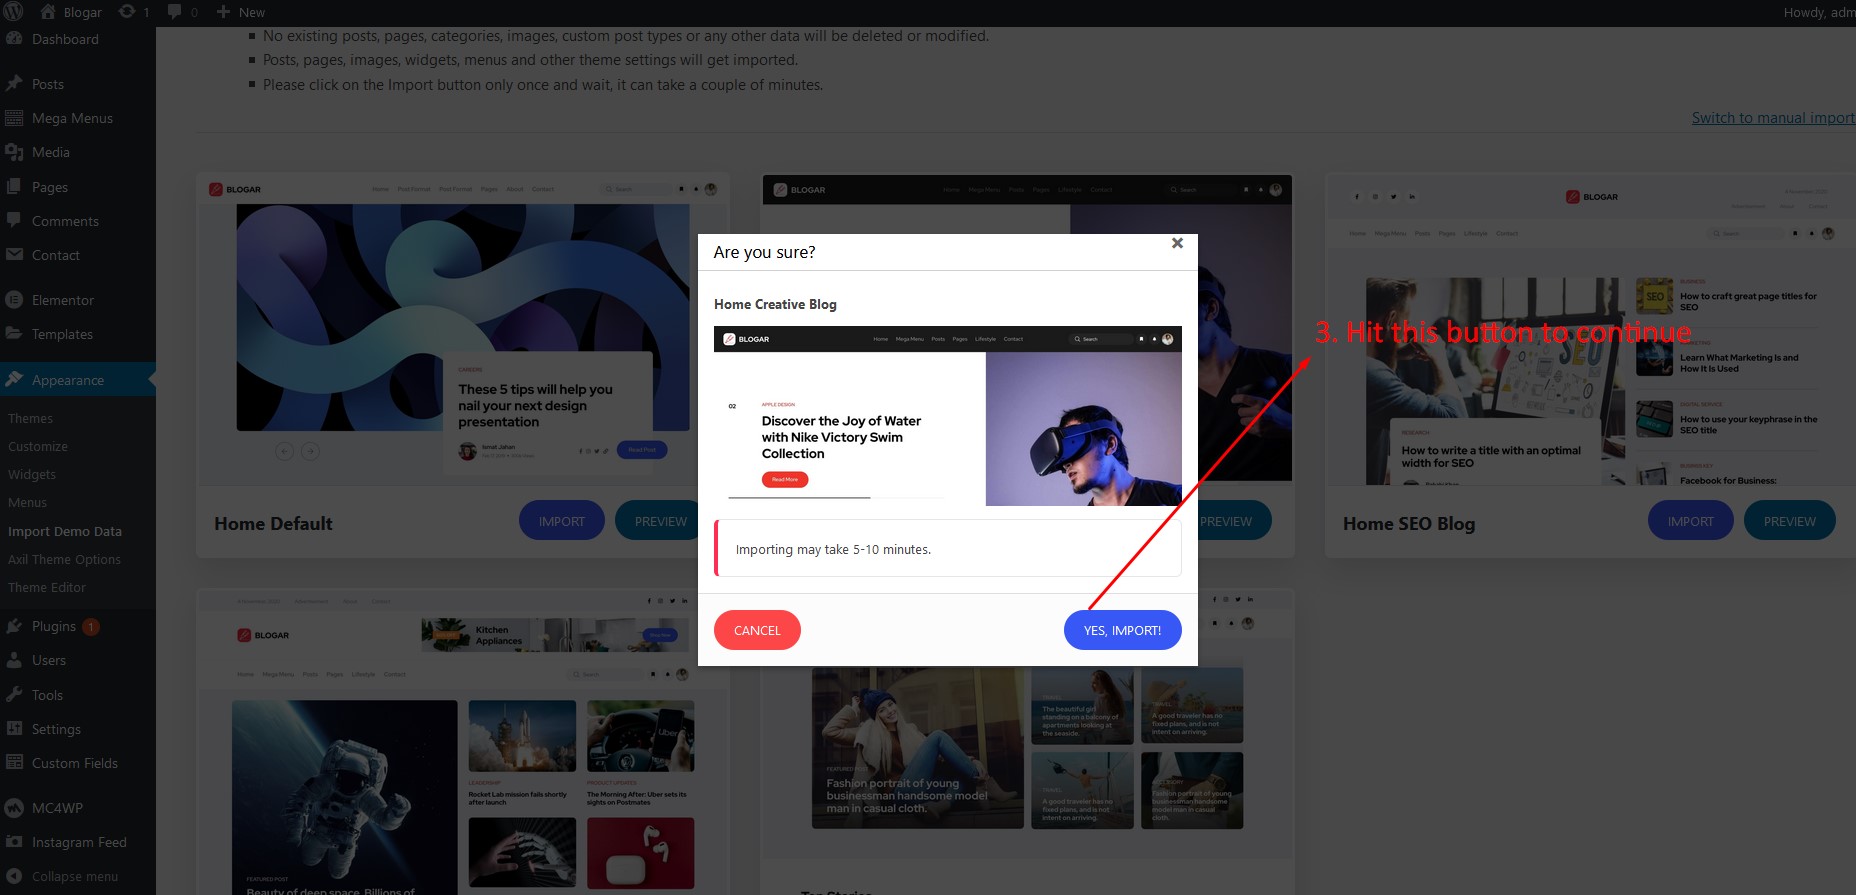
4. Importing Demo Contents
Blogar provides easy solution for importing demo that you saw on our preview website. Please follow the instructions below:

4.1. Where Is My Purchase Code?
When you buy a product from envato you get a purchase code. To learn about how to find your purchase code visit the following link:
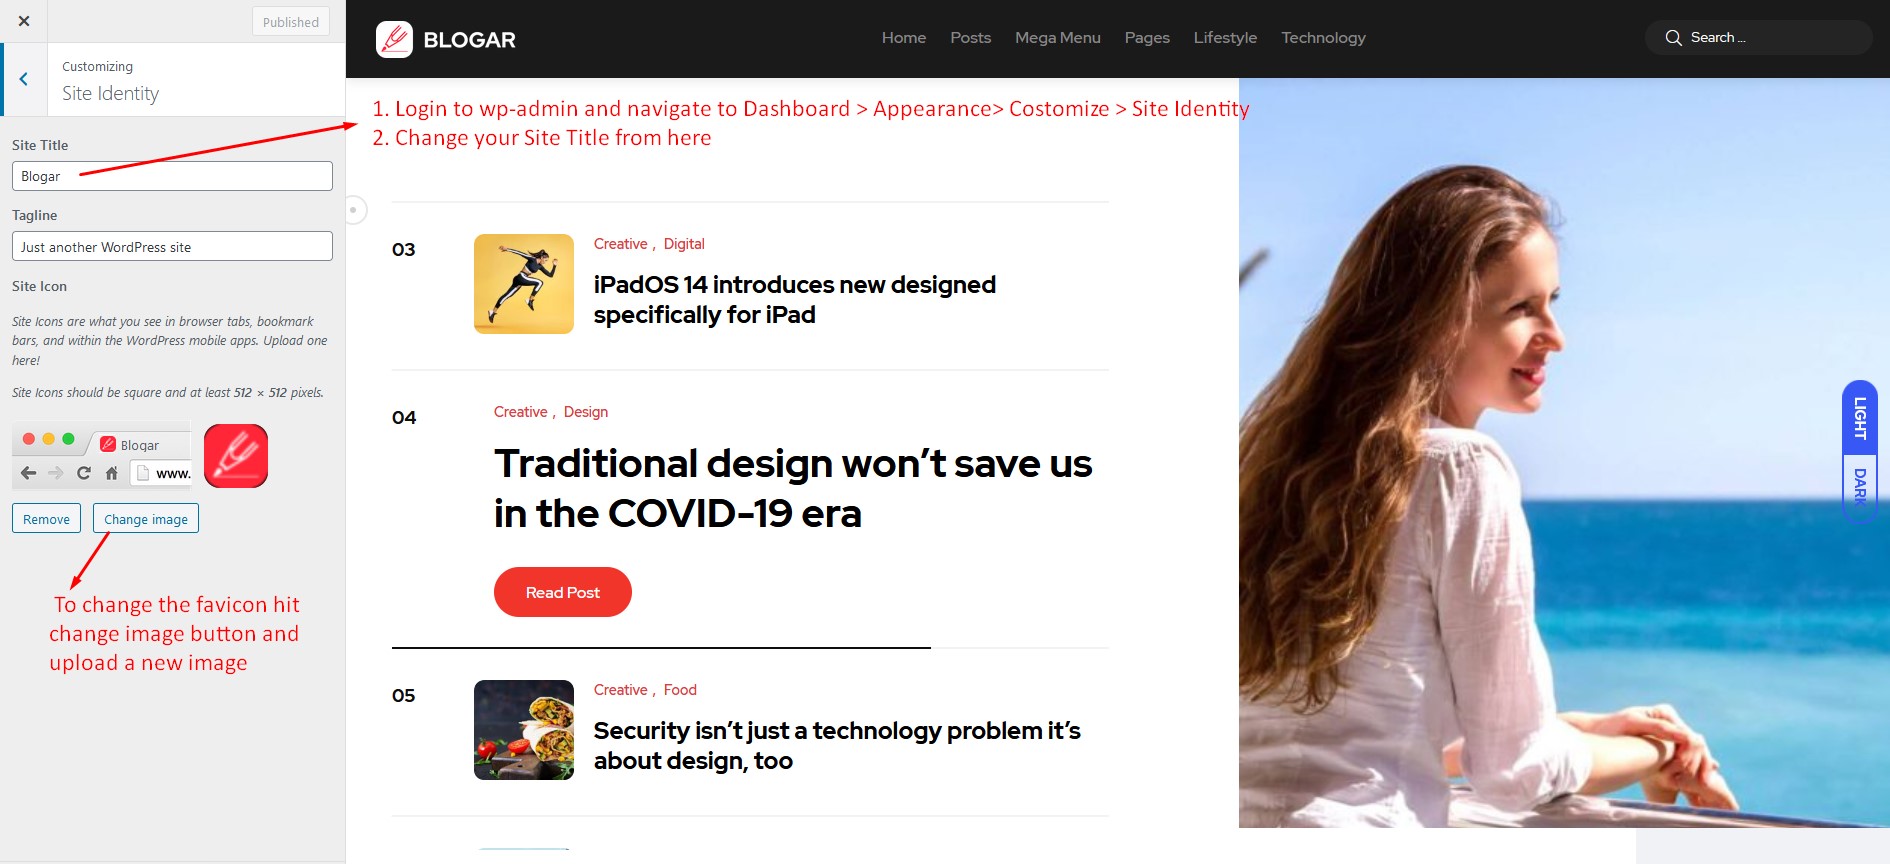
https://help.market.envato.com/hc/en-us/articles/202822600-Where-Can-I-Find-my-Purchase-Code5. Change Site Title and Favicon
To change your Site title and Favicon login to wp-admin and navigate to Dashboard > Appearance > Customize > Site Identity and follow the following steps:
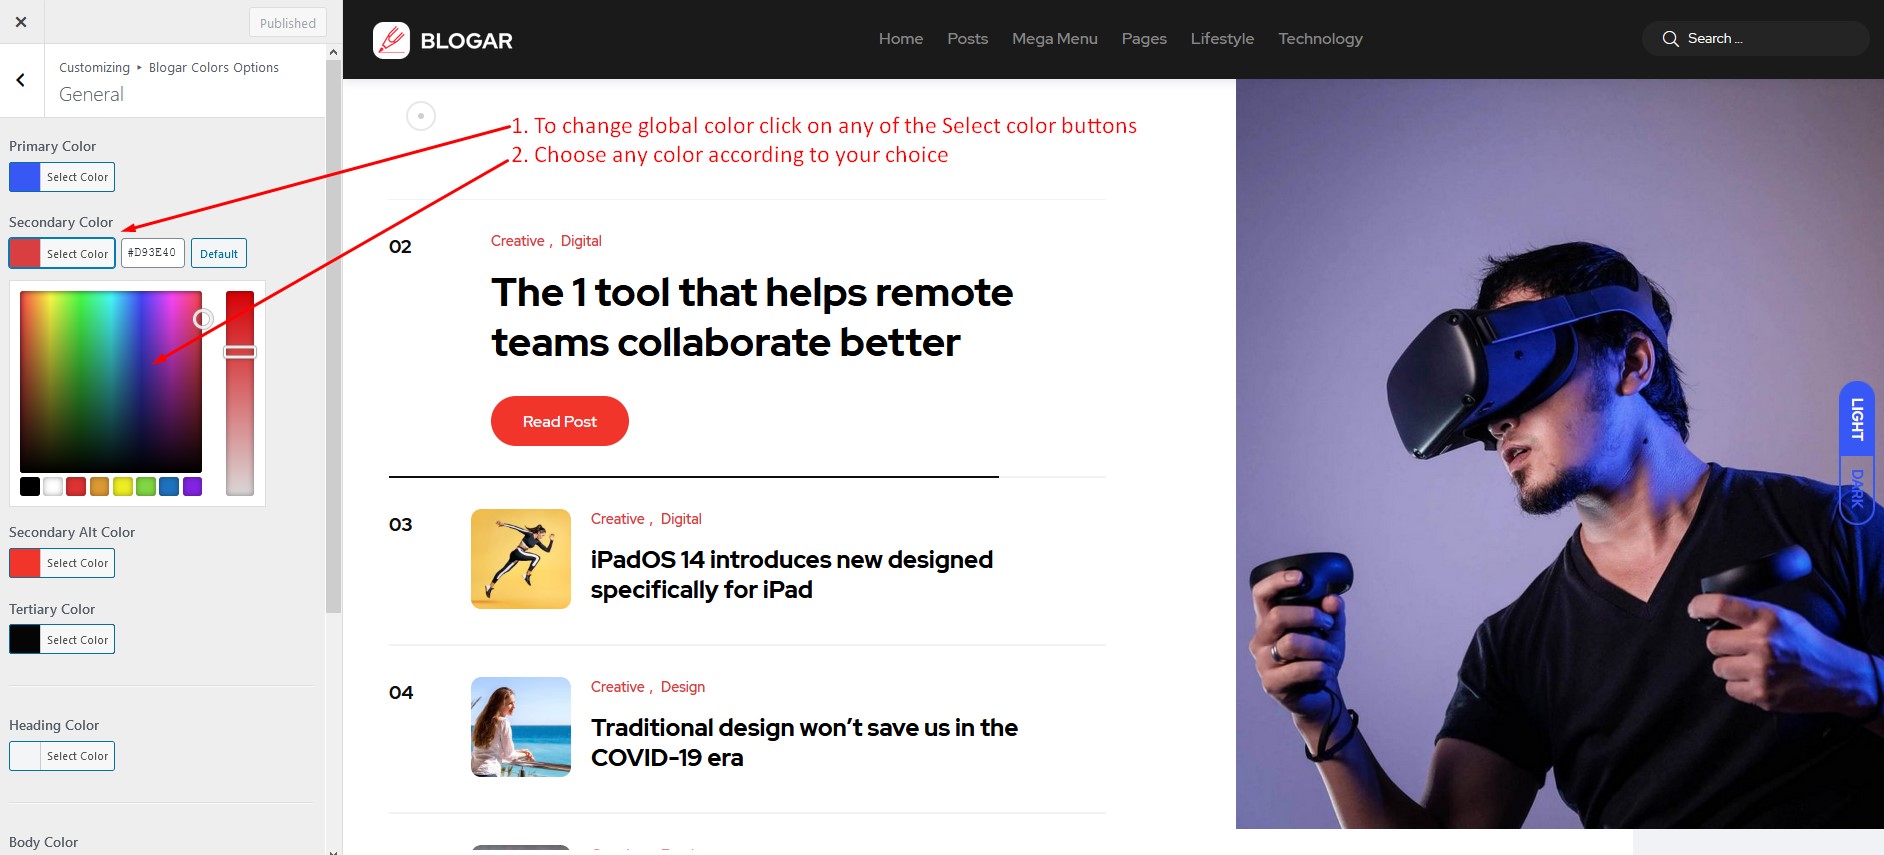
6. Change Global Colors
To change all global colors login to wp-admin and navigate to Dashboard > Appearance > Customize > Colors and follow the following steps:
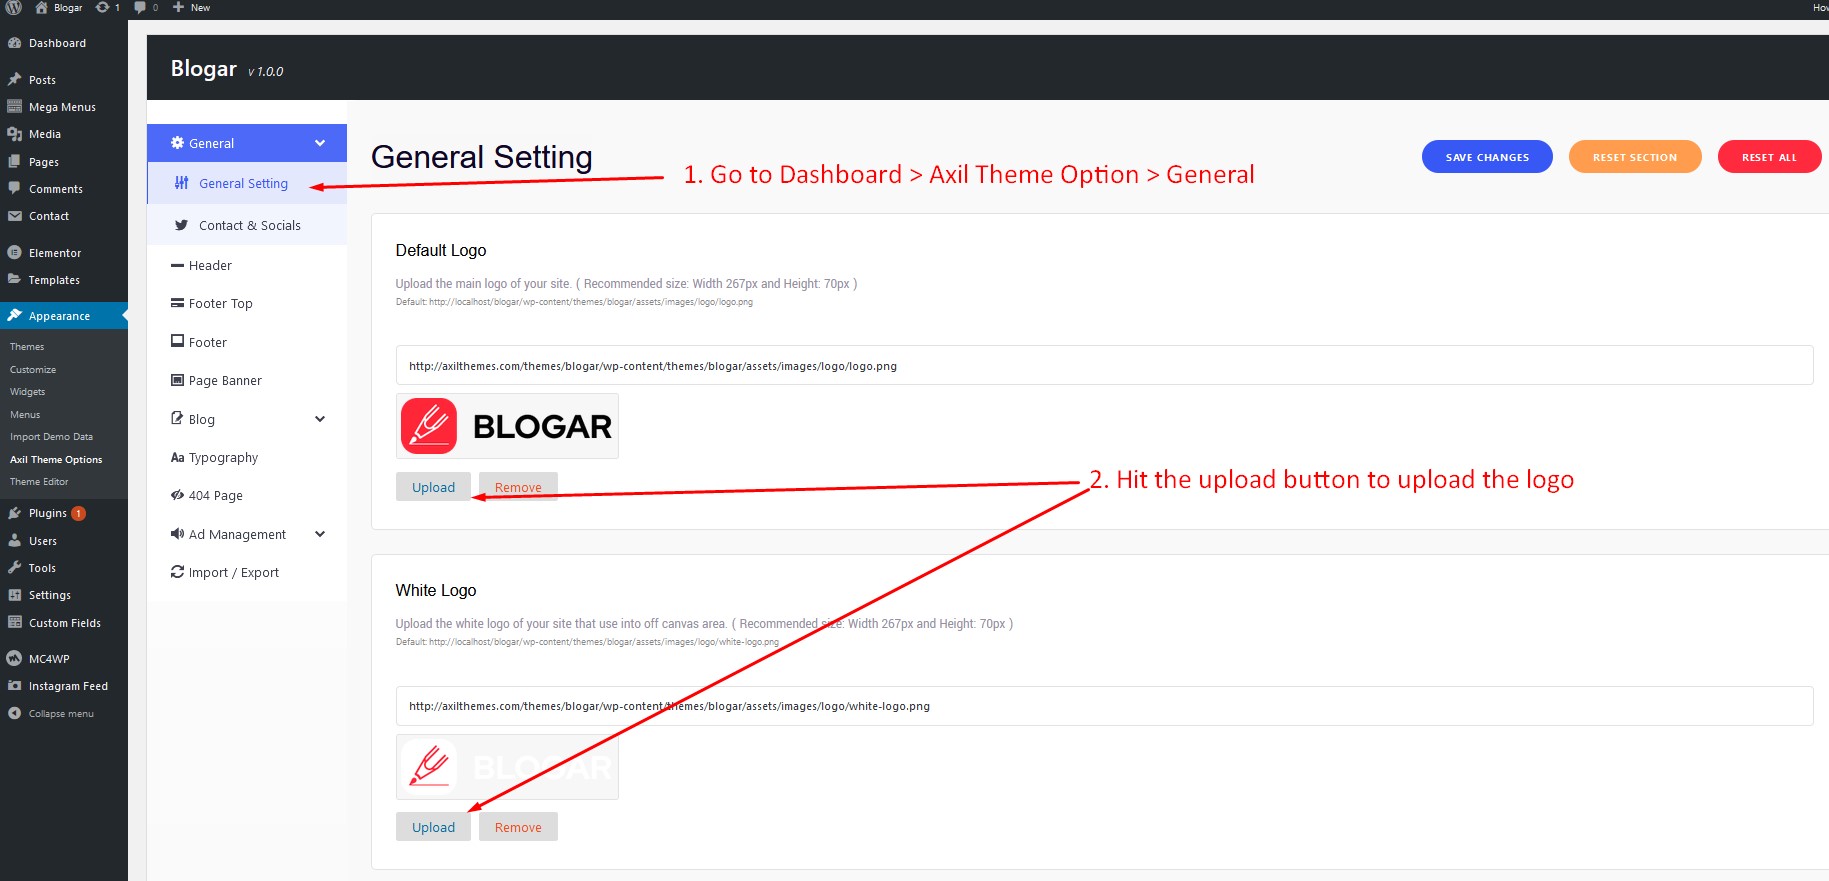
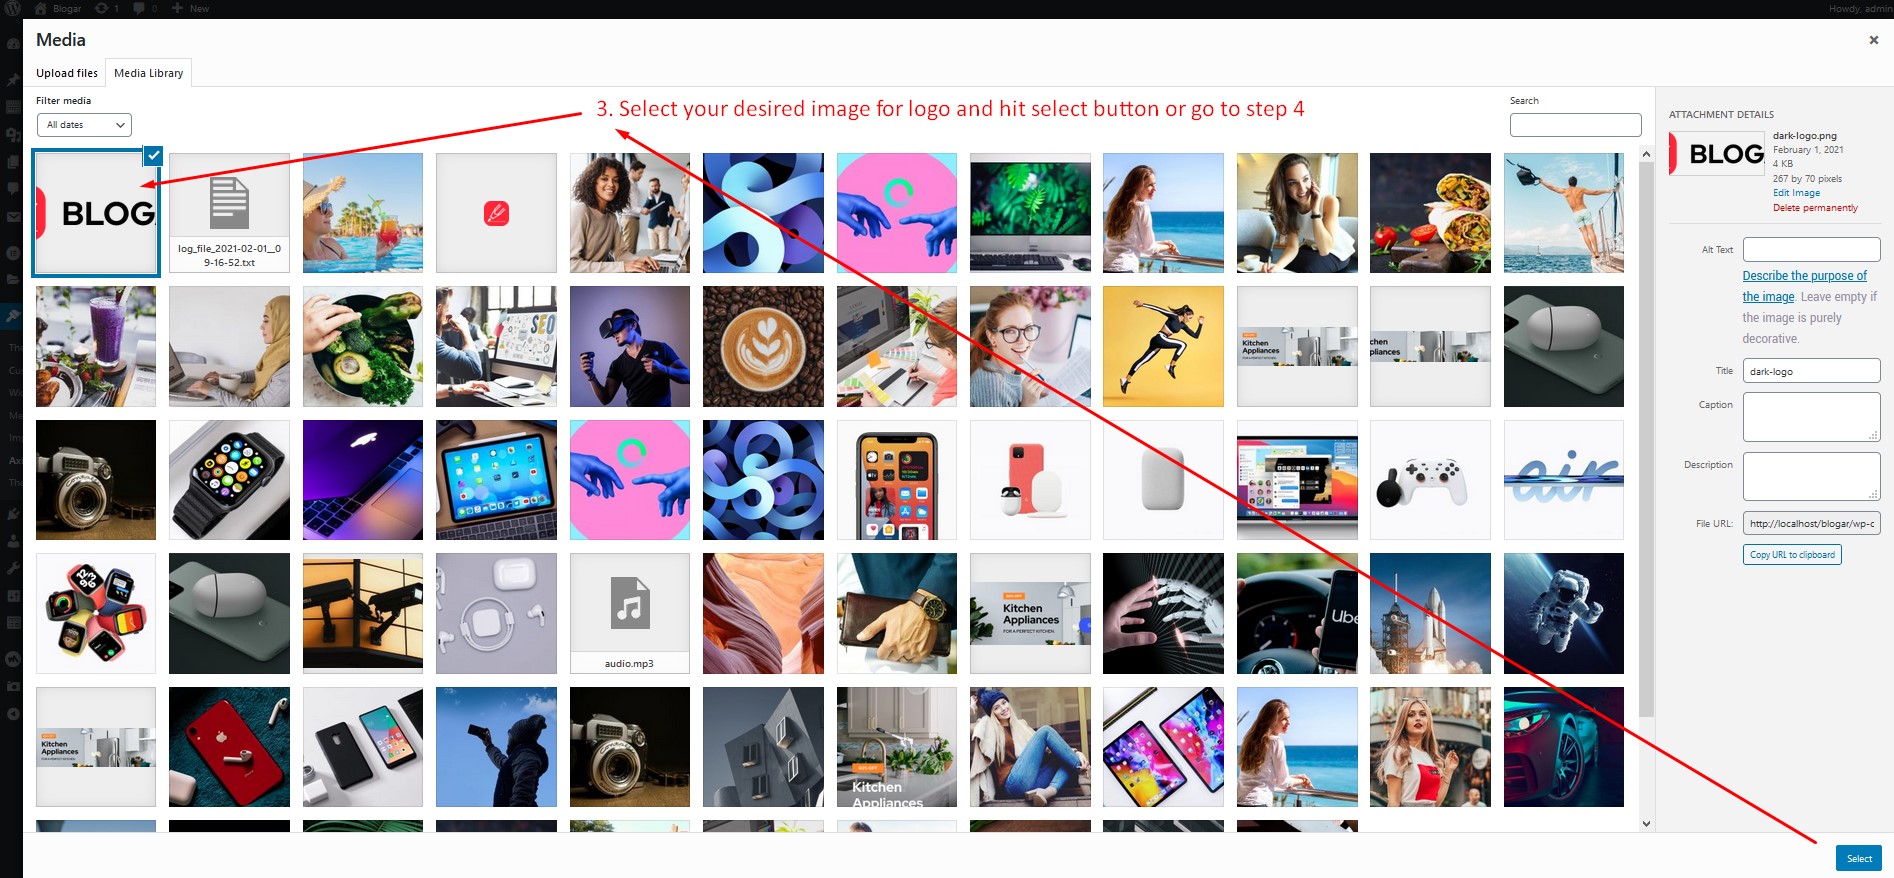
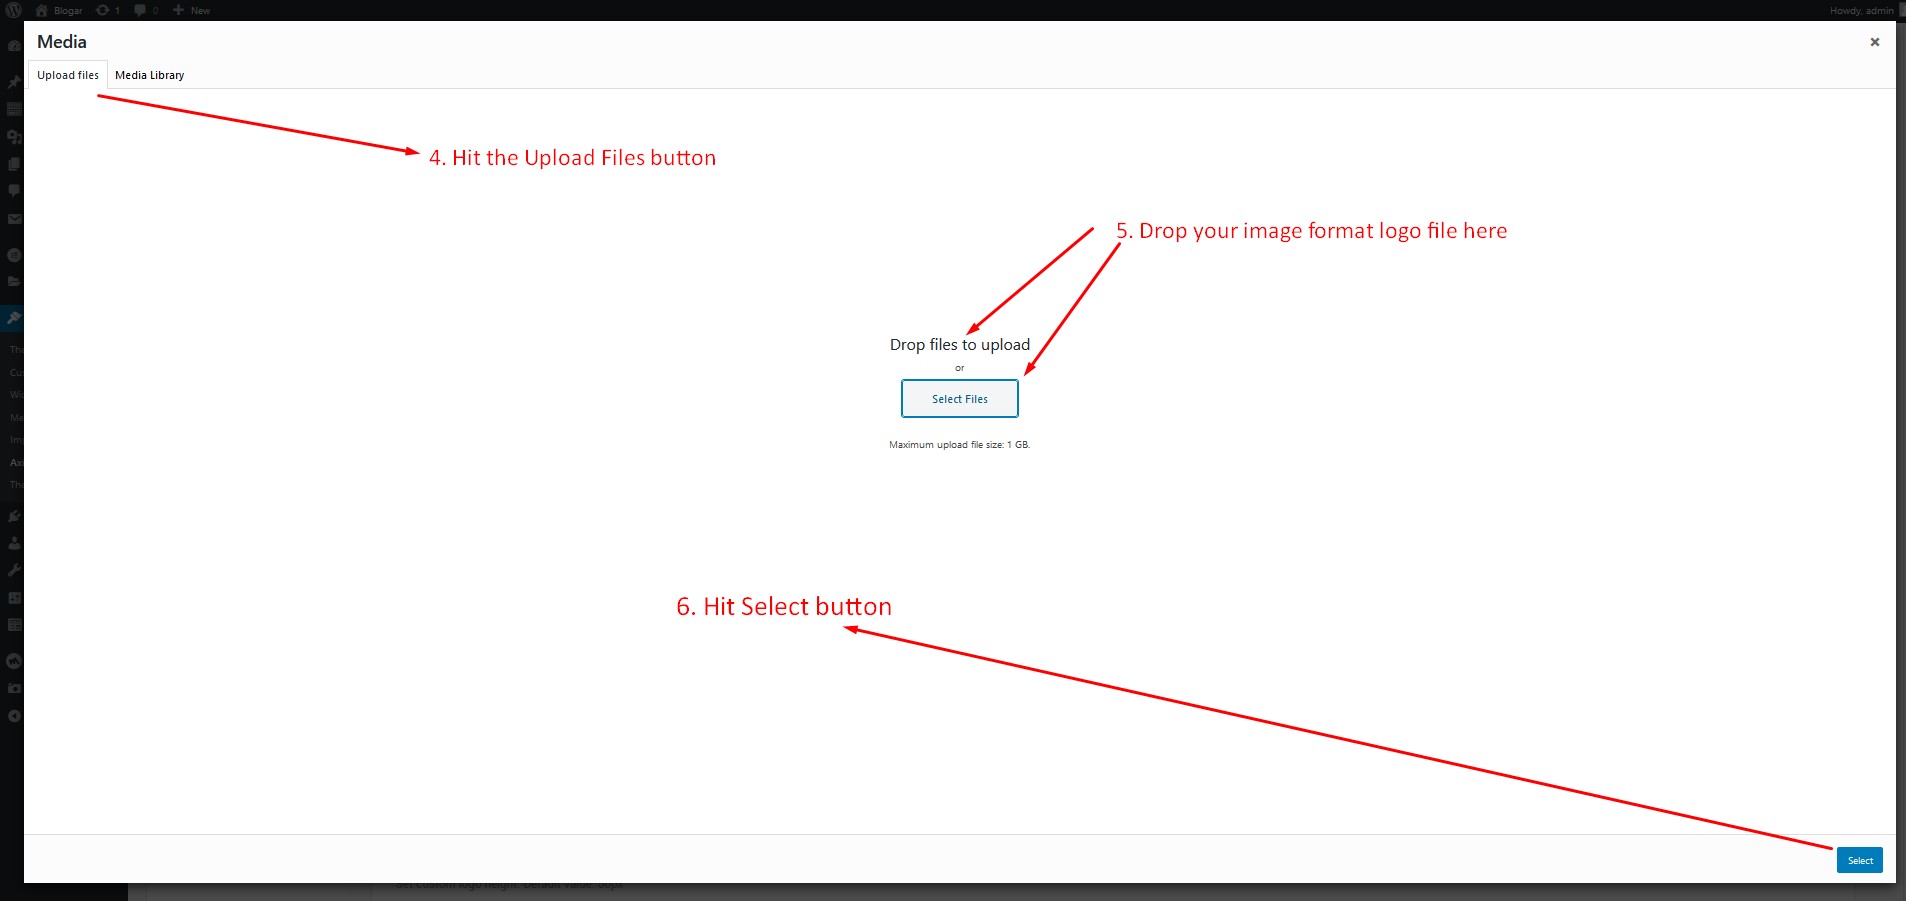
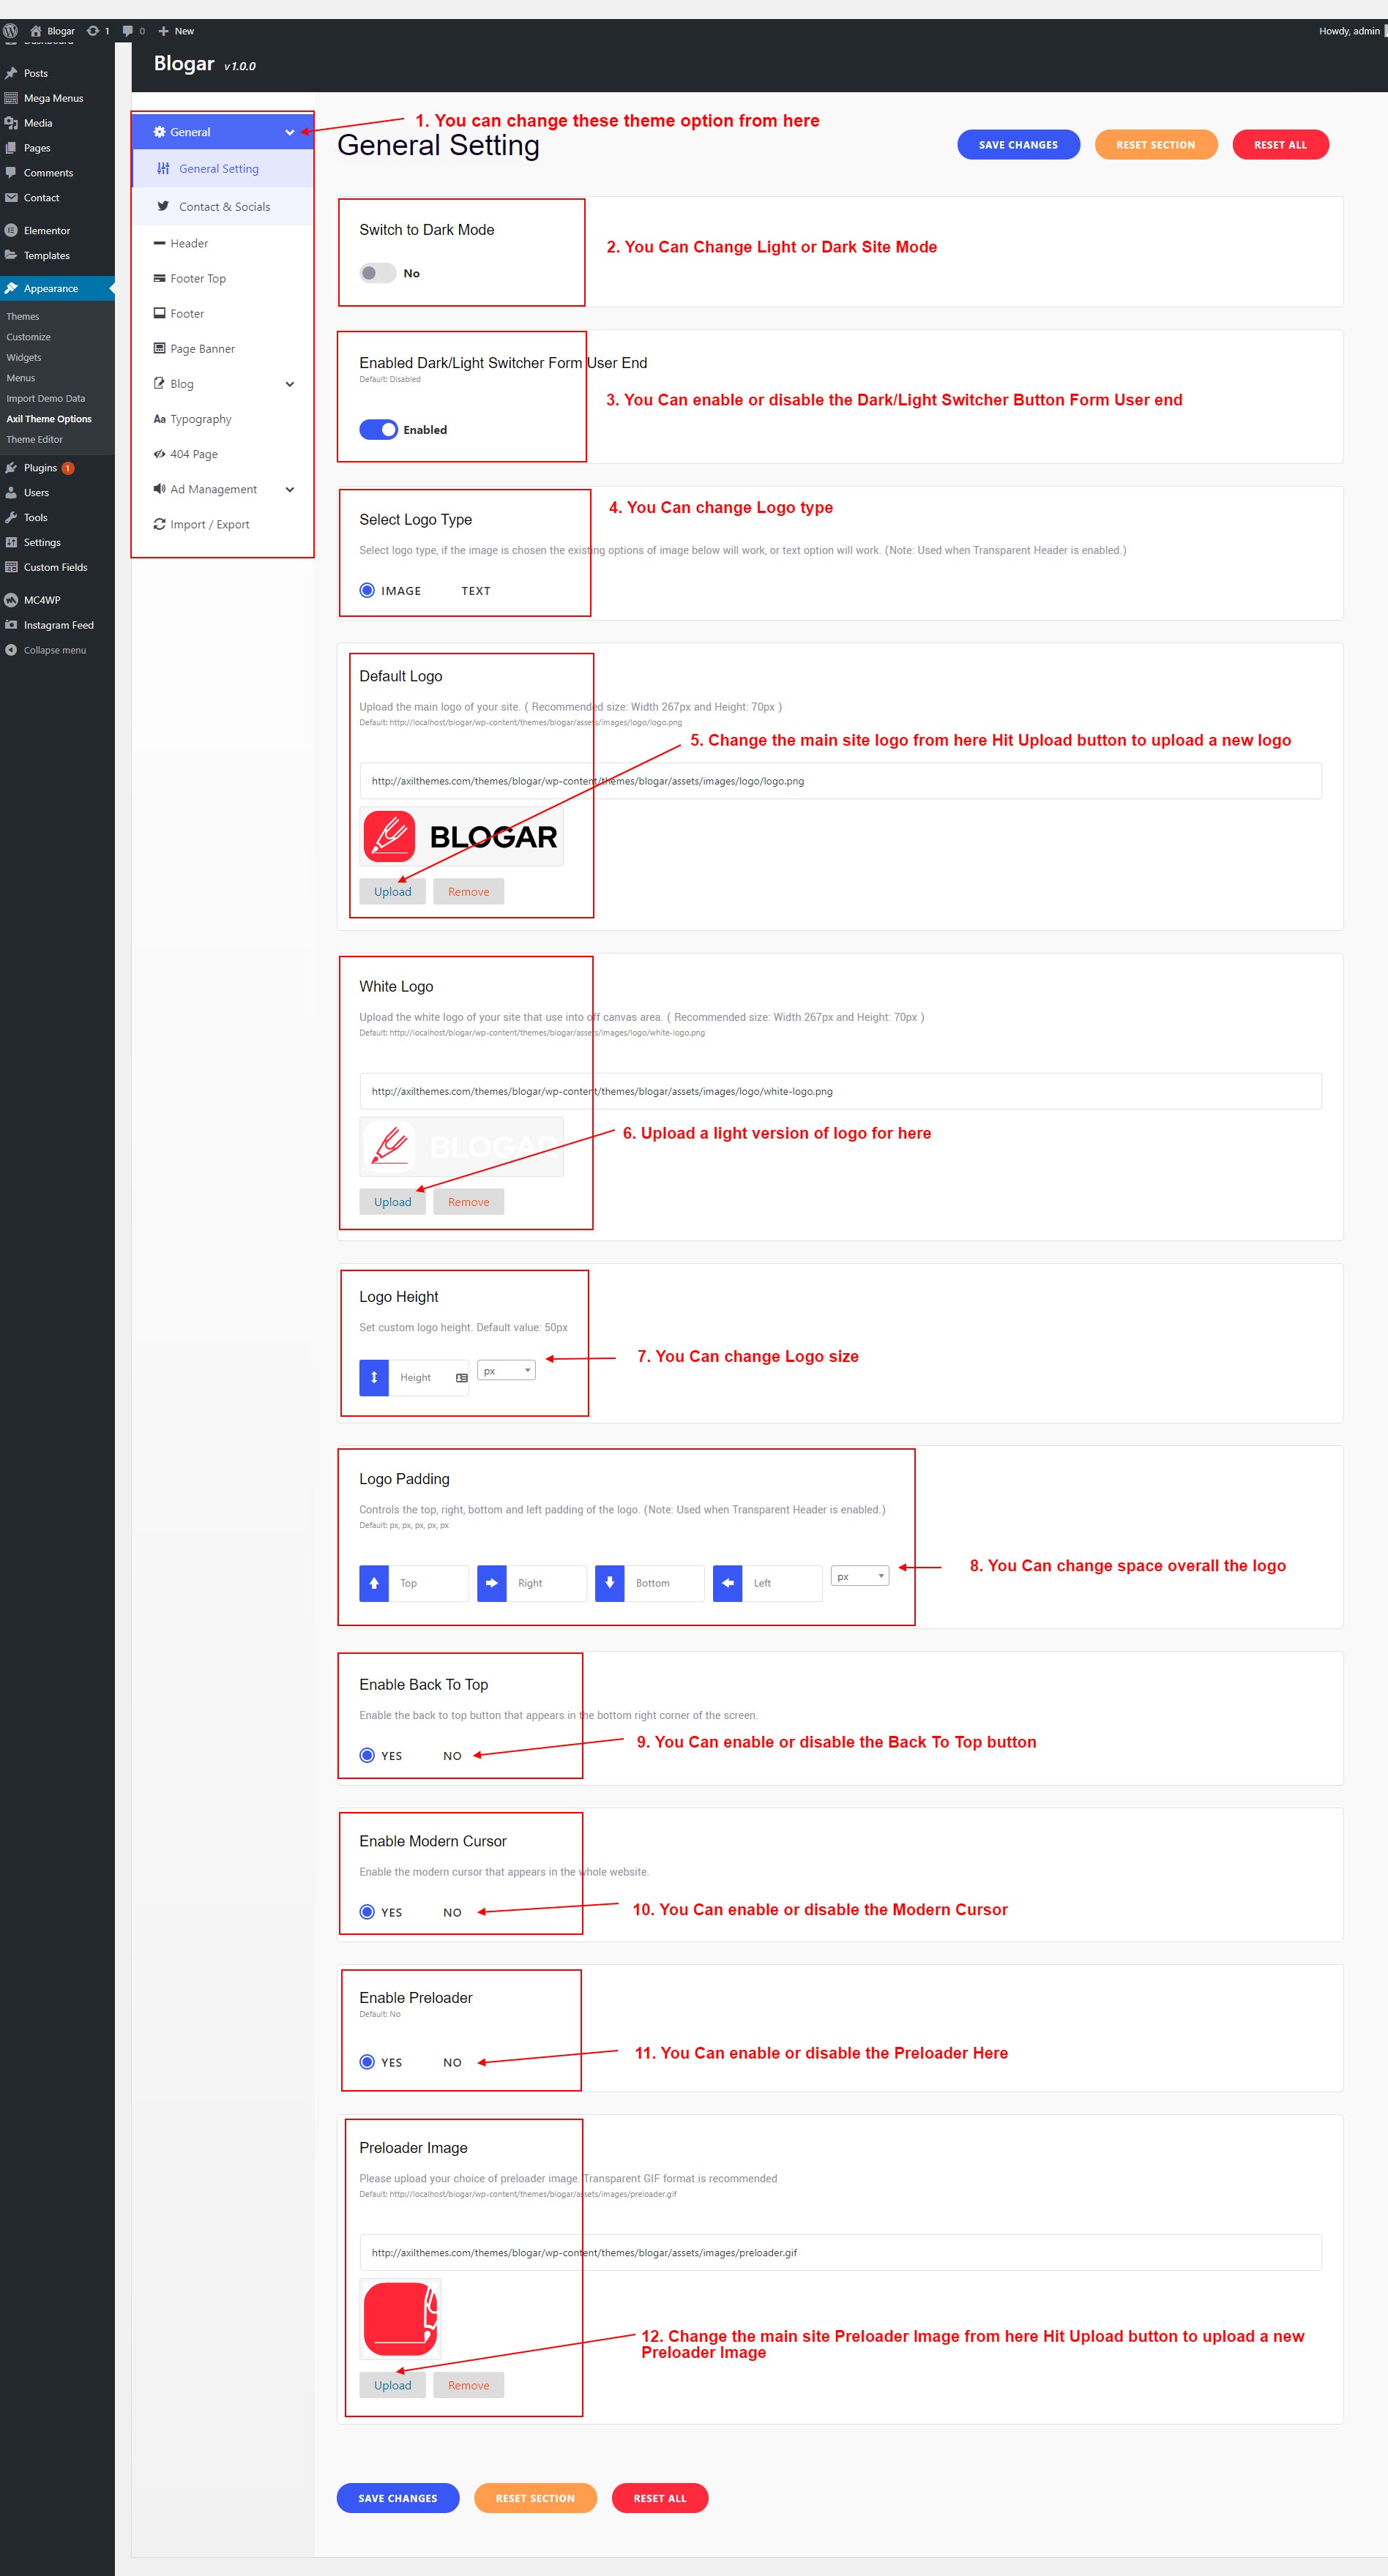
7. Change Logo
To change the site logo login to your wp-admin and navigate to Dashboard > Blogar Options > General and follow the following steps:
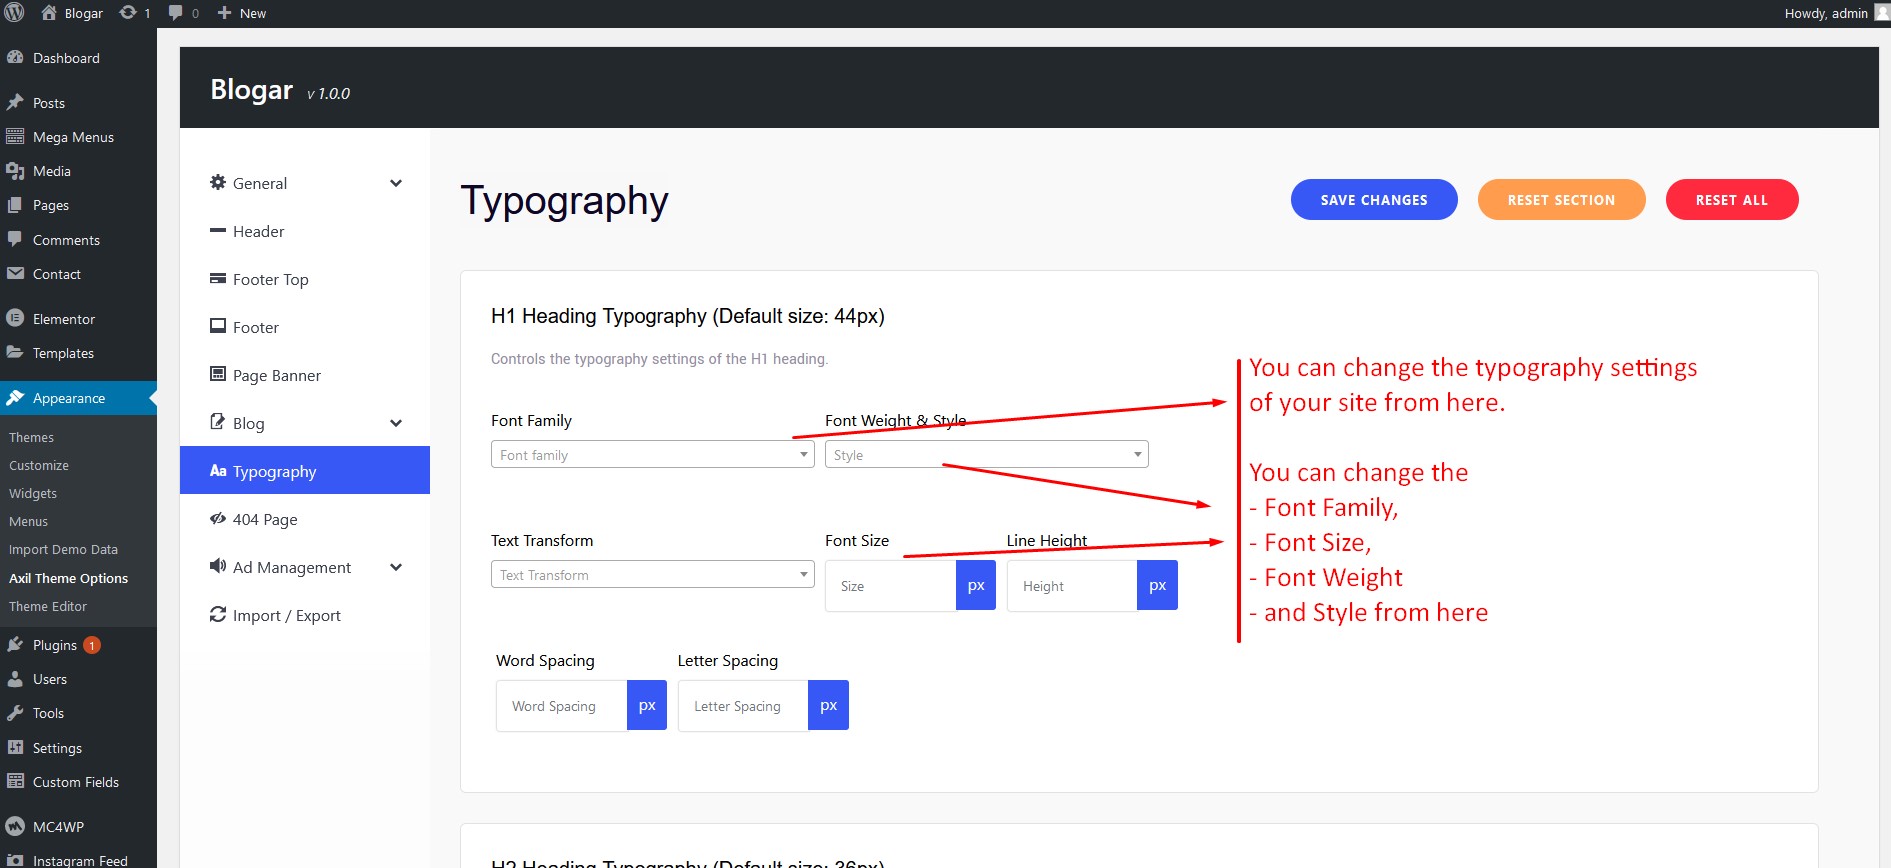
8. Change Typography
To change the typography of your site navigate to Appearance > Blogar Options > Typography.
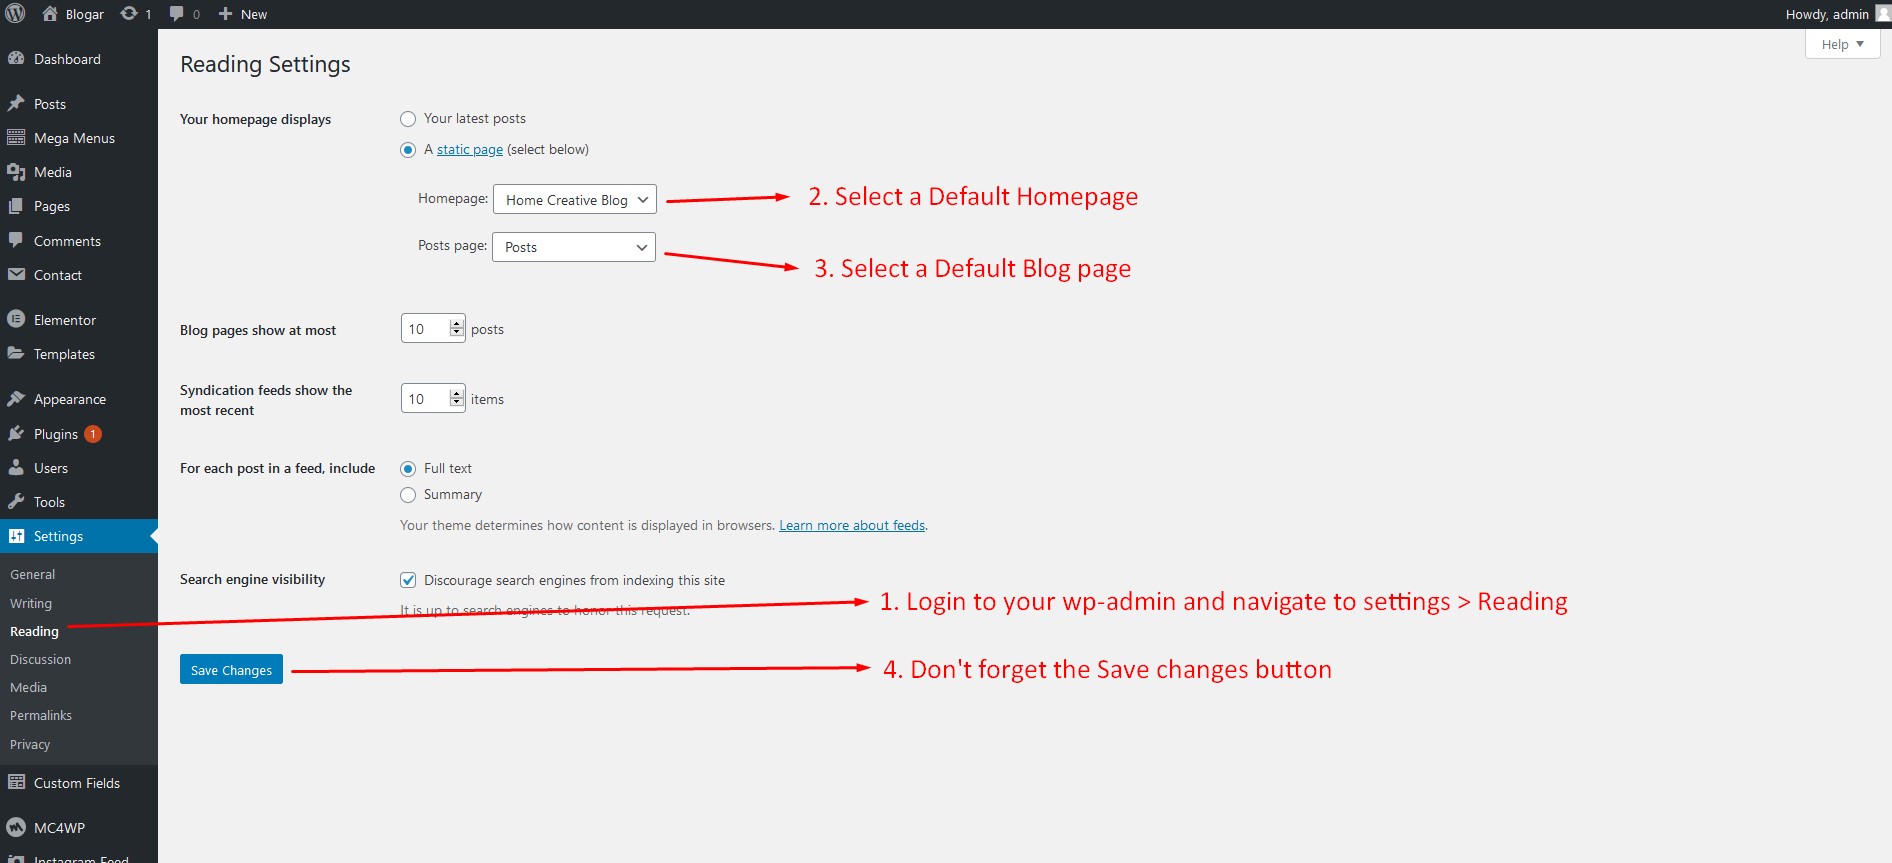
9. Set Home and Blog Page
To set the default Home and Blog page please login to wp-admin and navigate to Dashboard > Settings > Reading
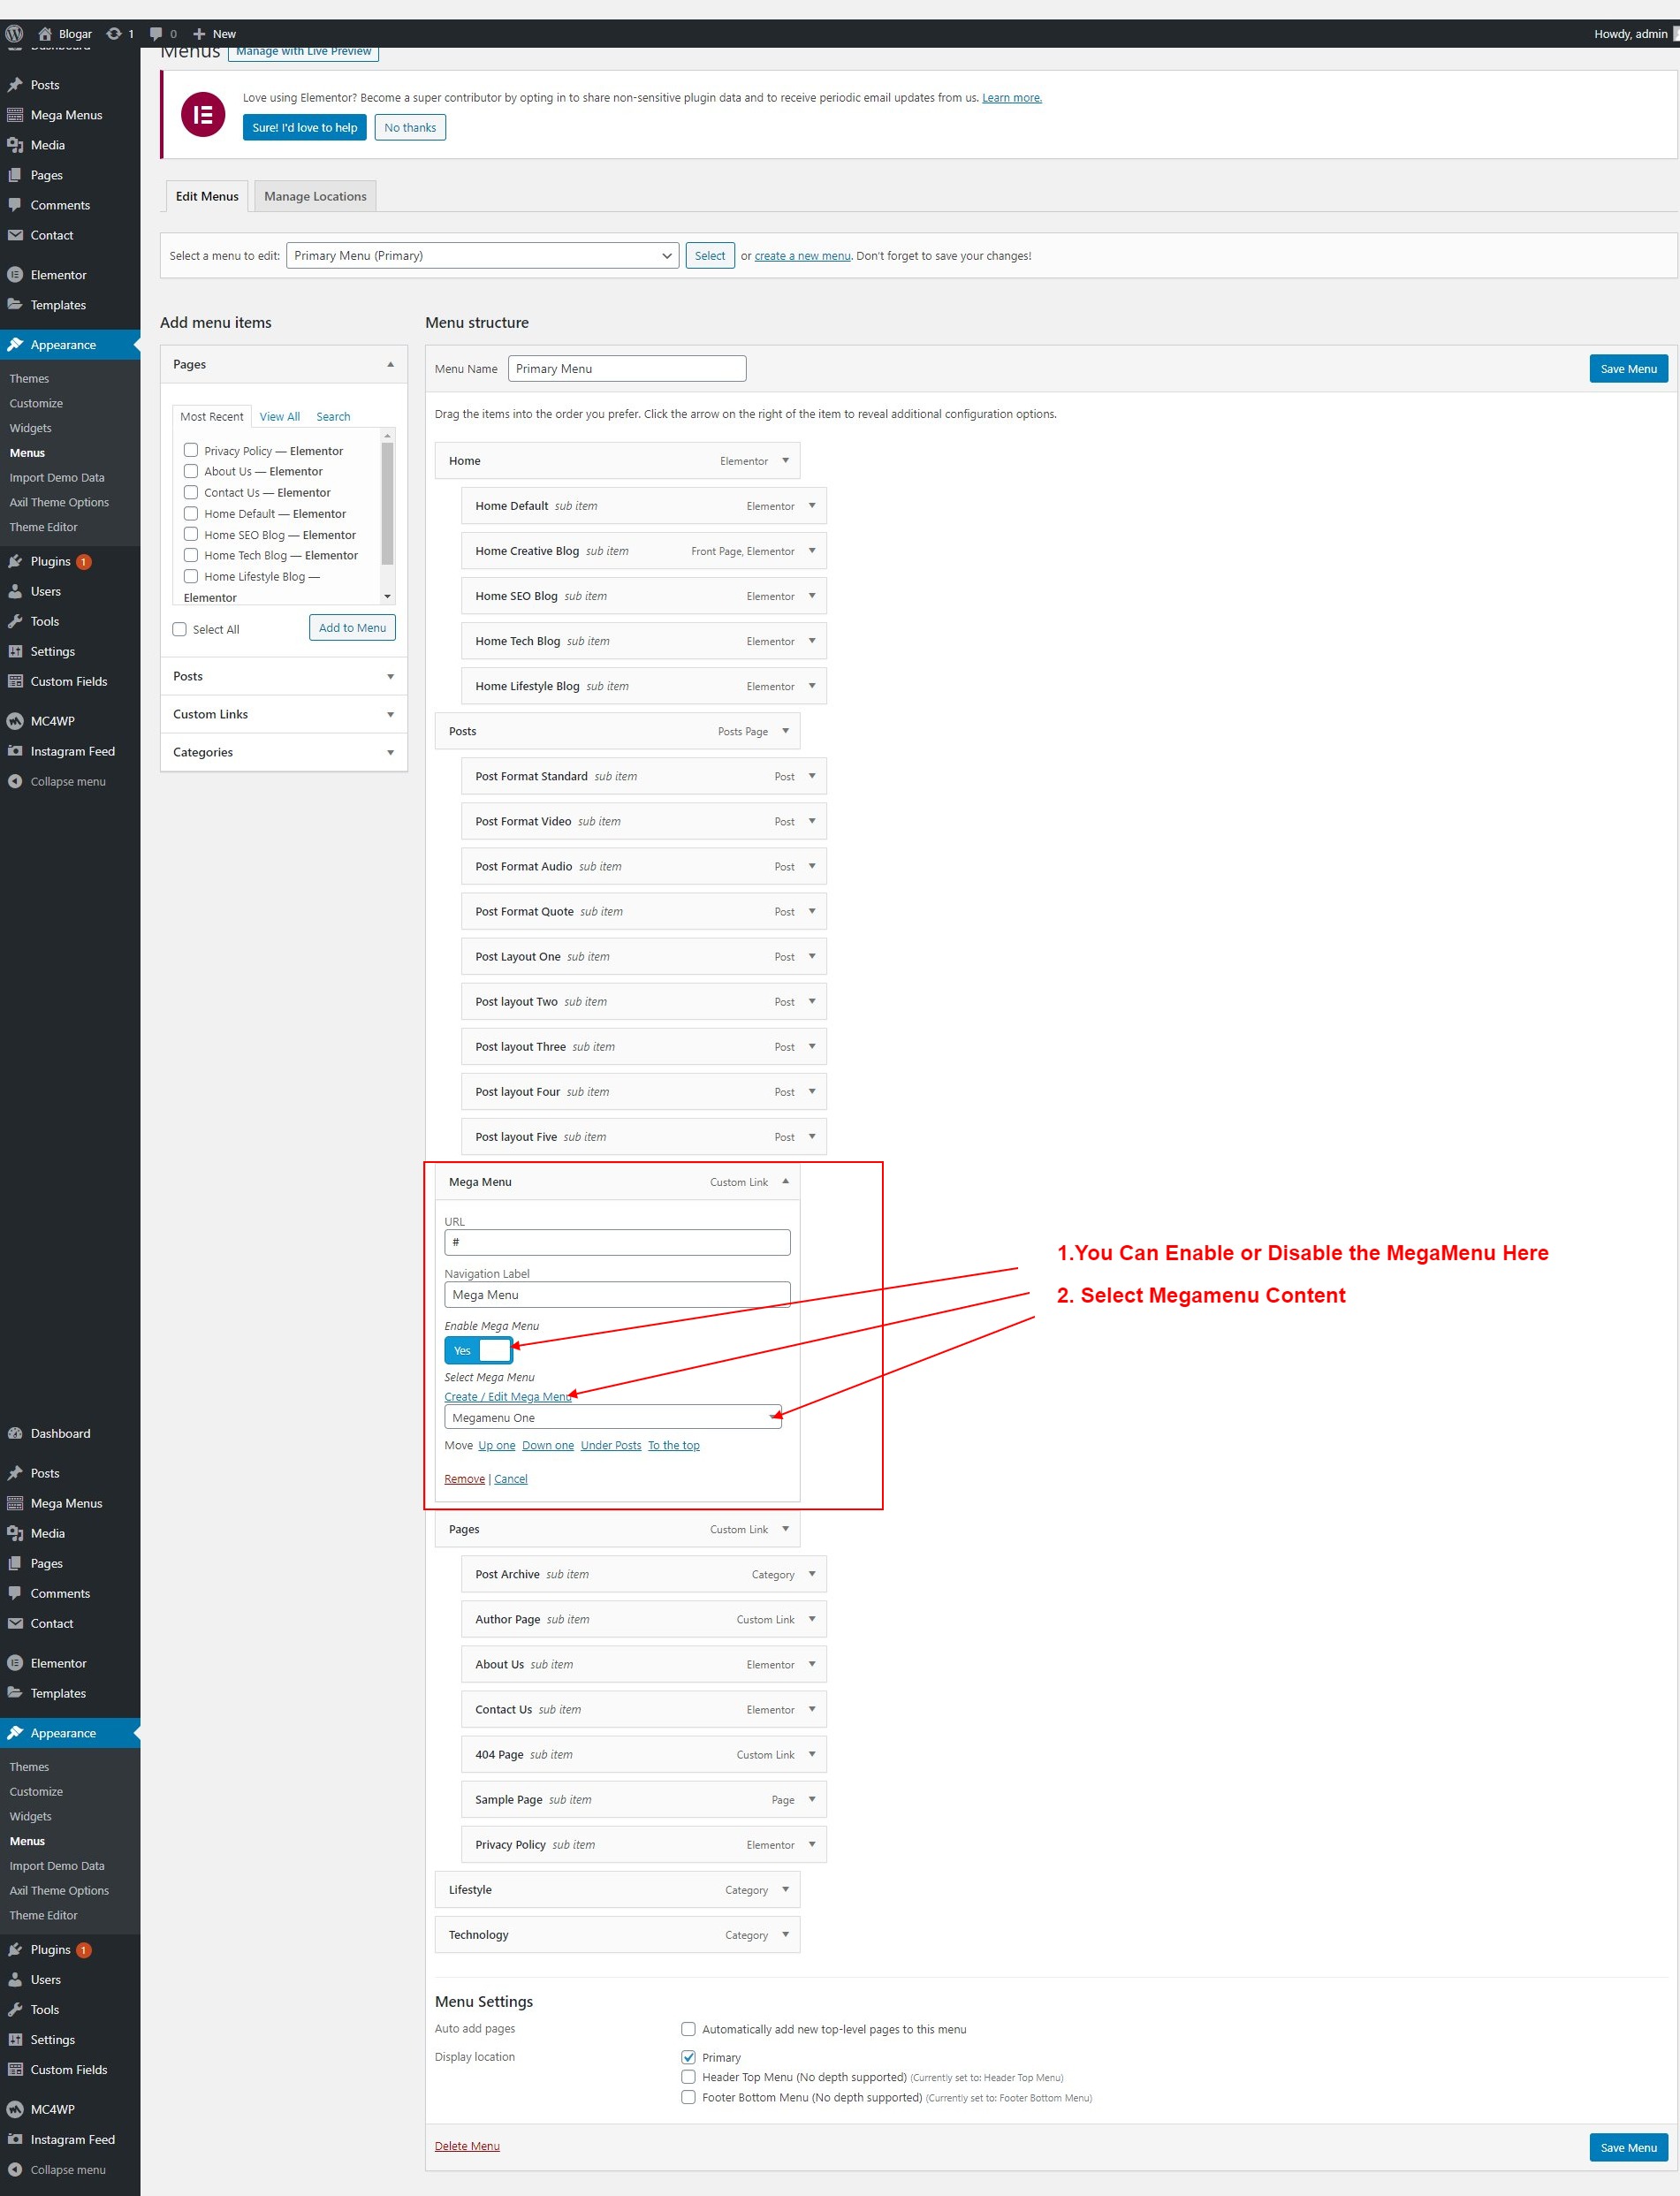
10. Customize Menu
To customize the menu and megamenu please login to wp-admin and navigate to Appearance > Menus and follow the following steps:

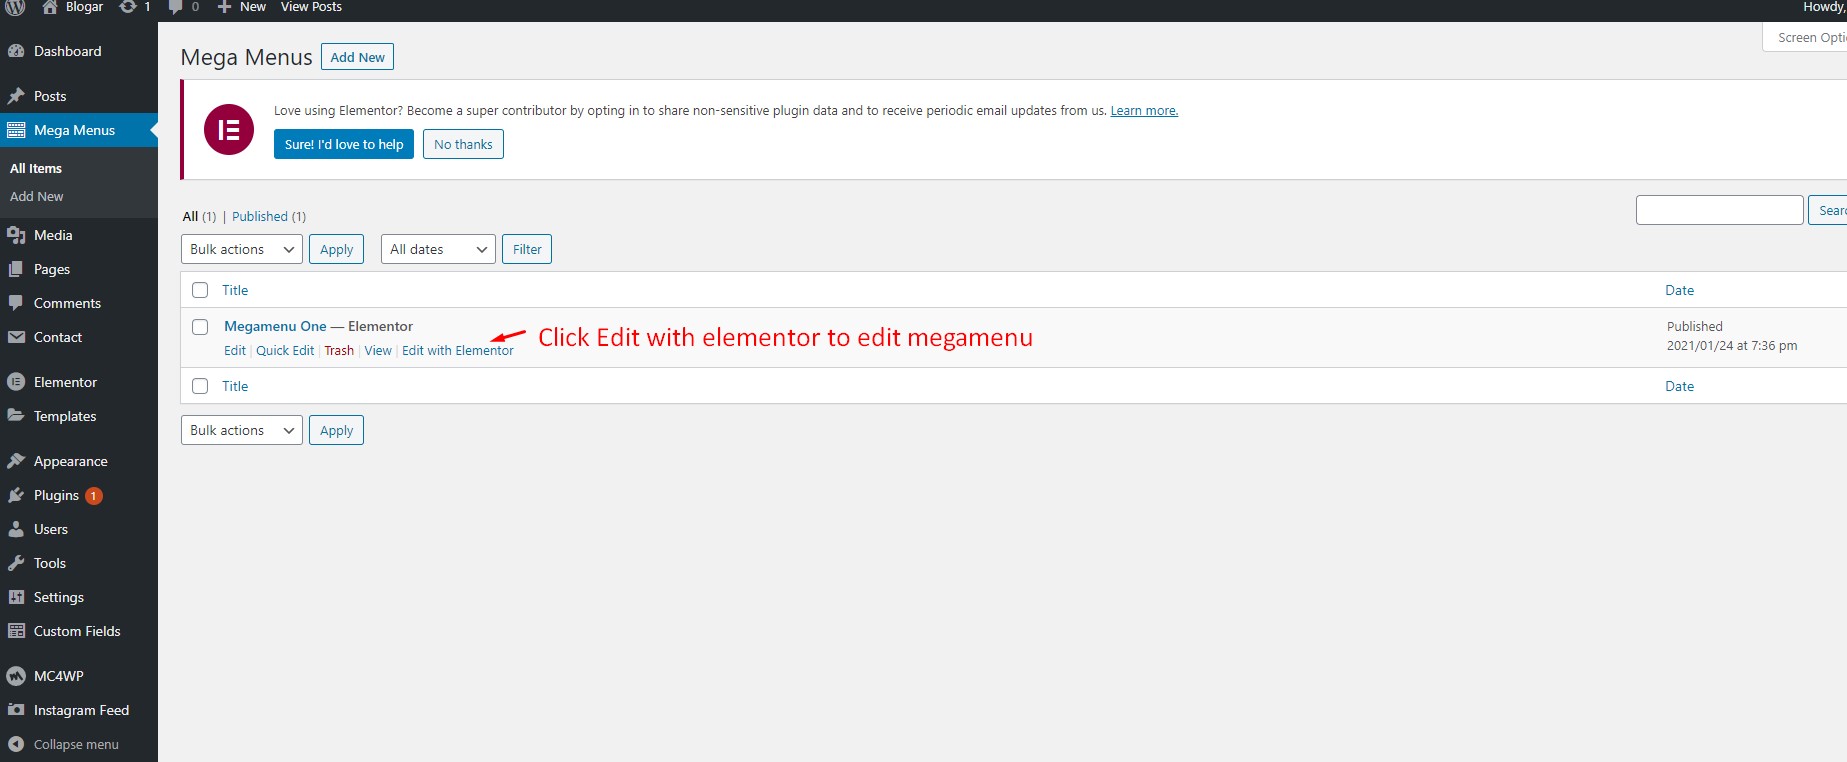
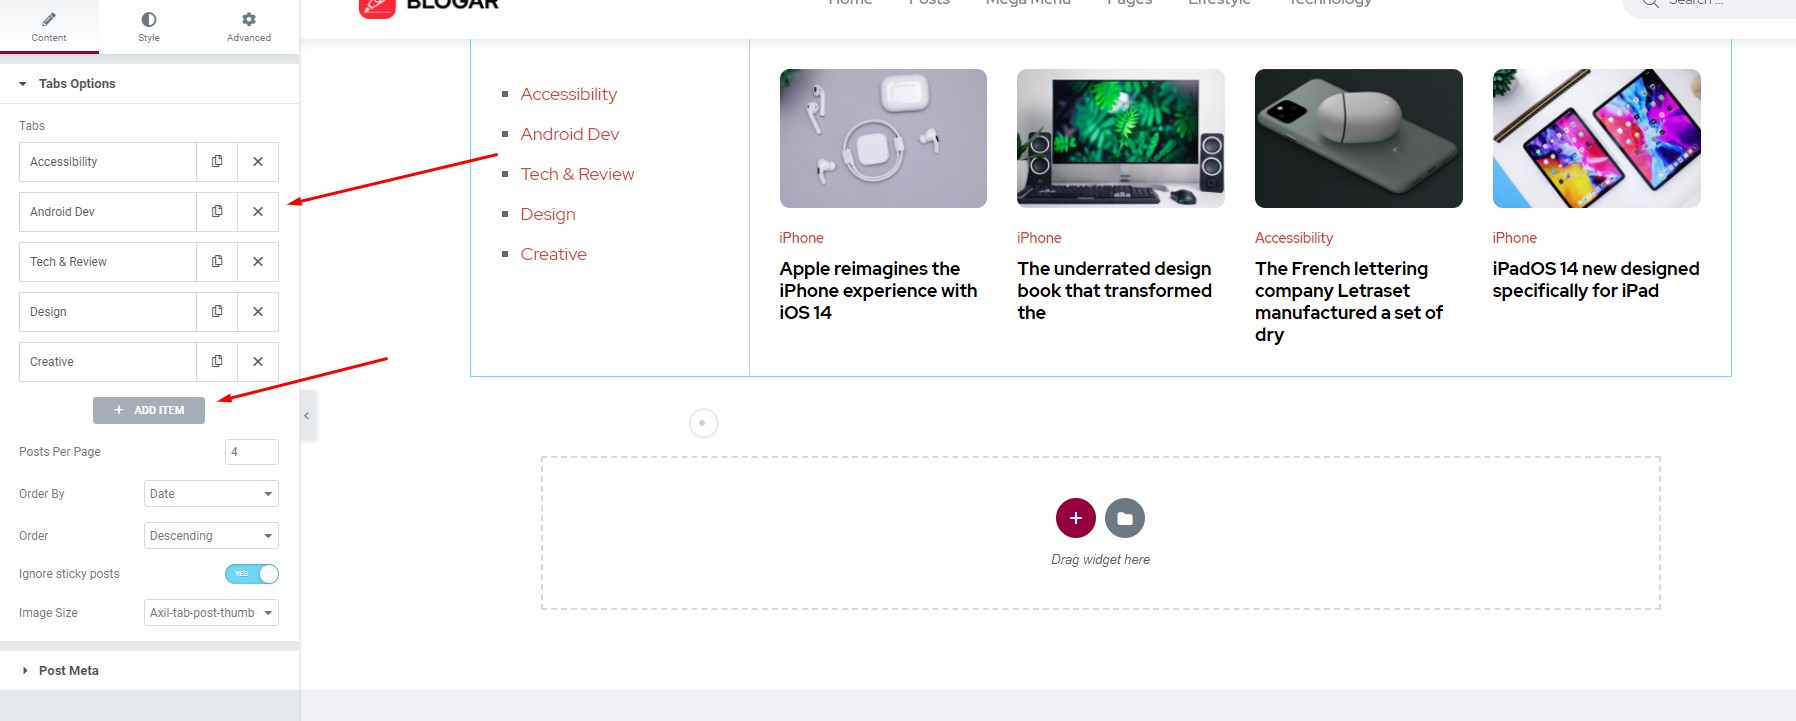
10.1 Customize Mega Menu
To customize the menu and megamenu please login to wp-admin and navigate to Appearance > Mega Menus and follow the following steps:
11.1.1 Blogar Options / General
To change Blogar Options navigate to Appearance > Blogar Options.
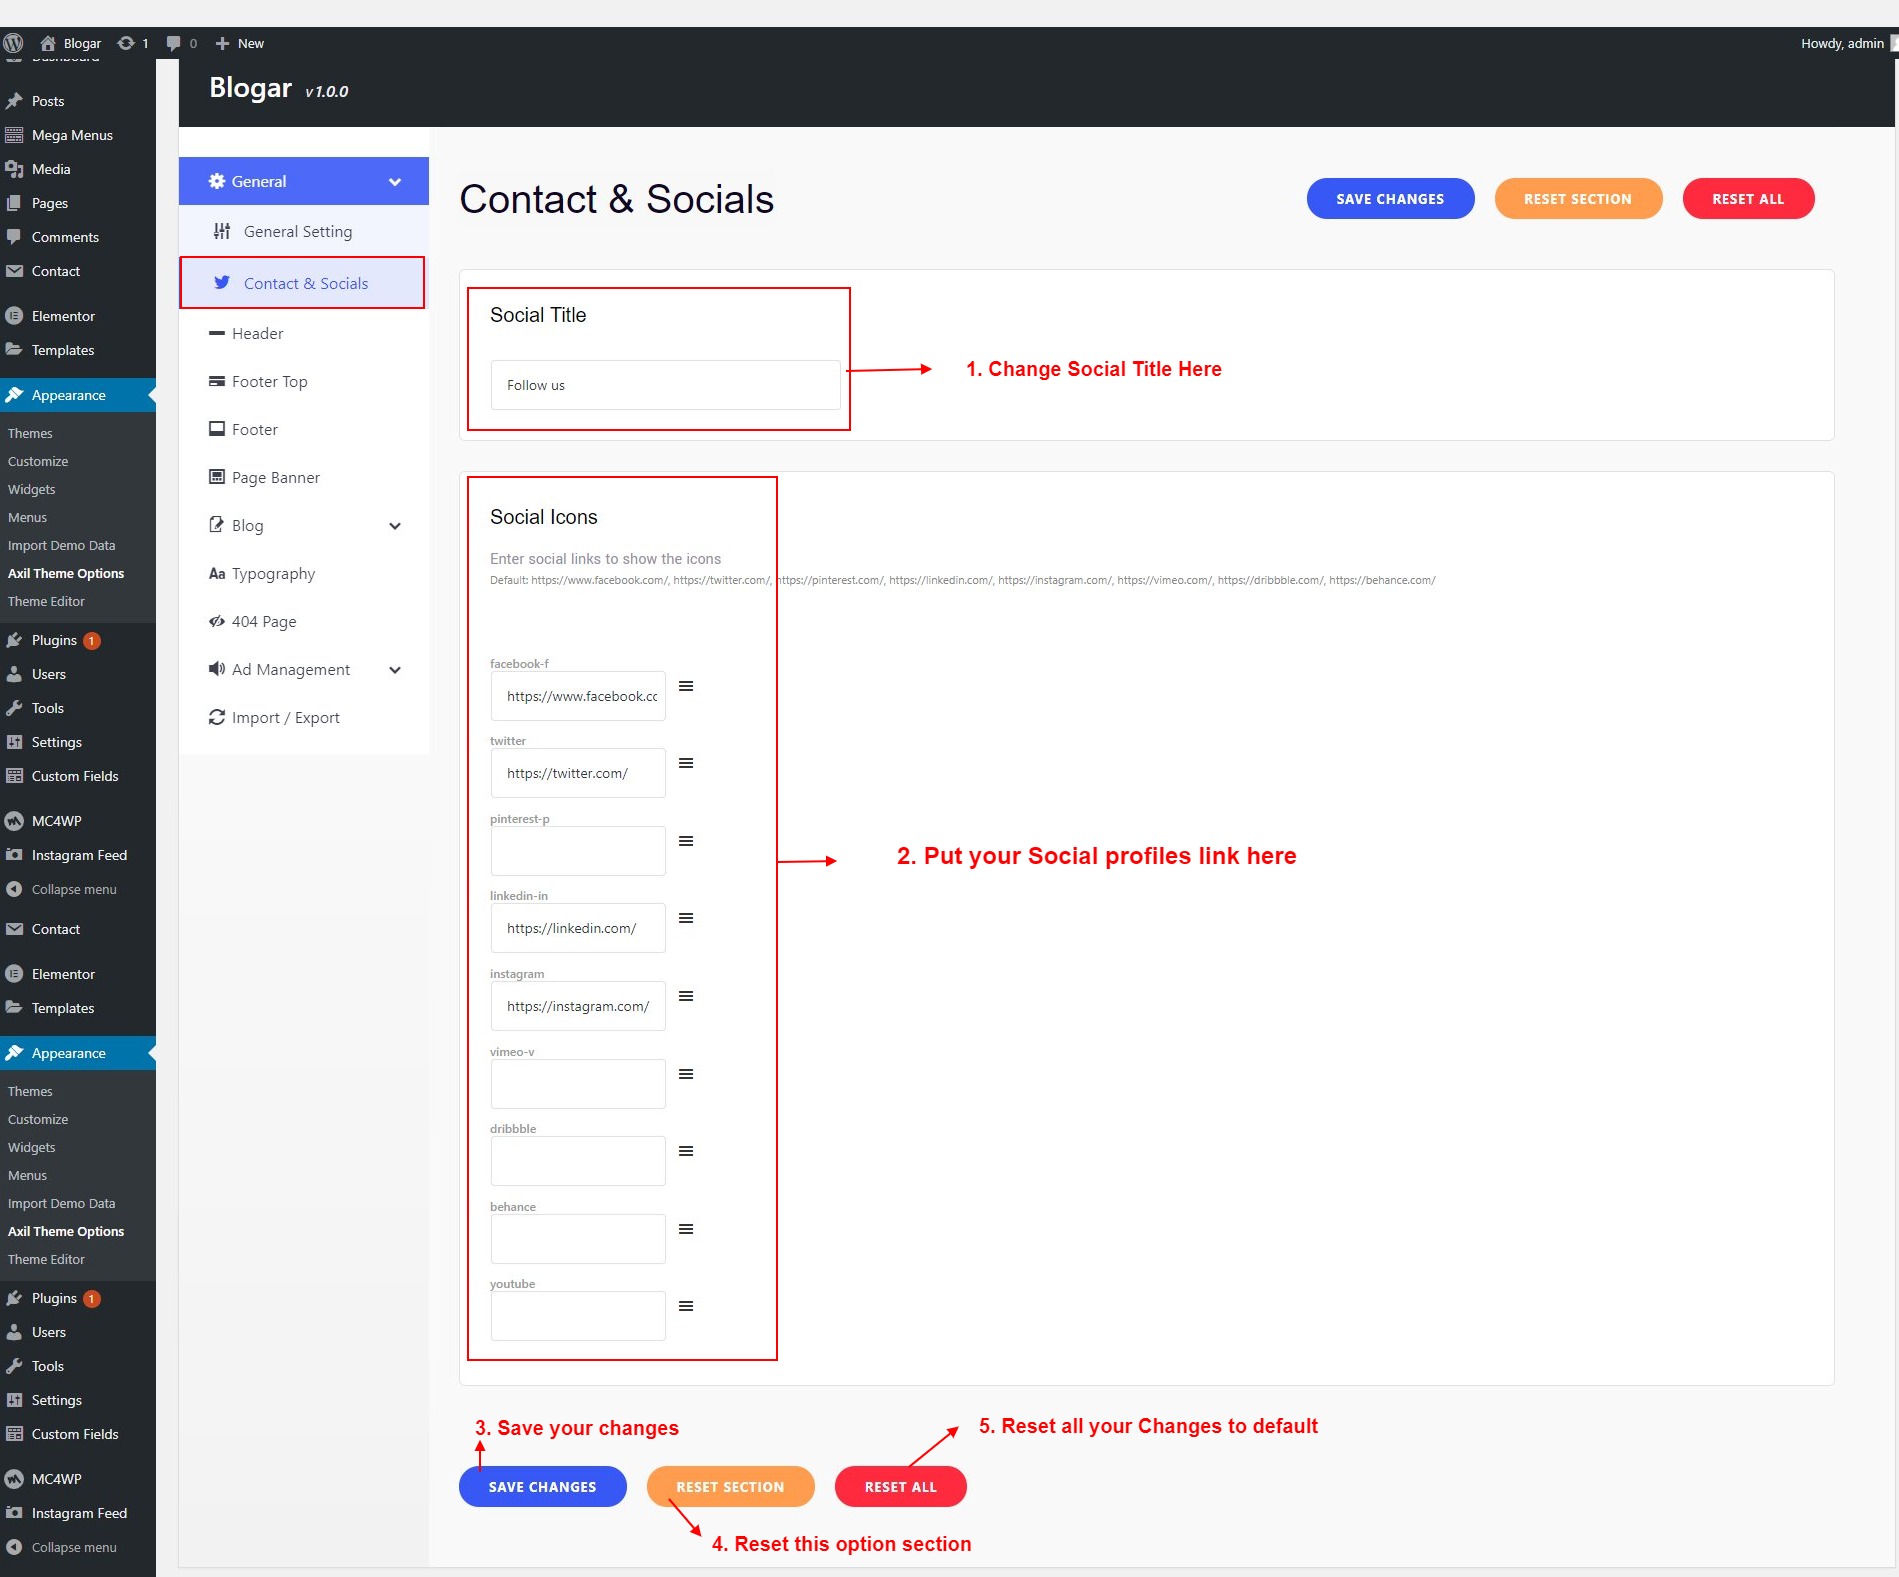
11.1.3. Contact & Social
To change Blogar Options navigate to Appearance > Blogar Options.
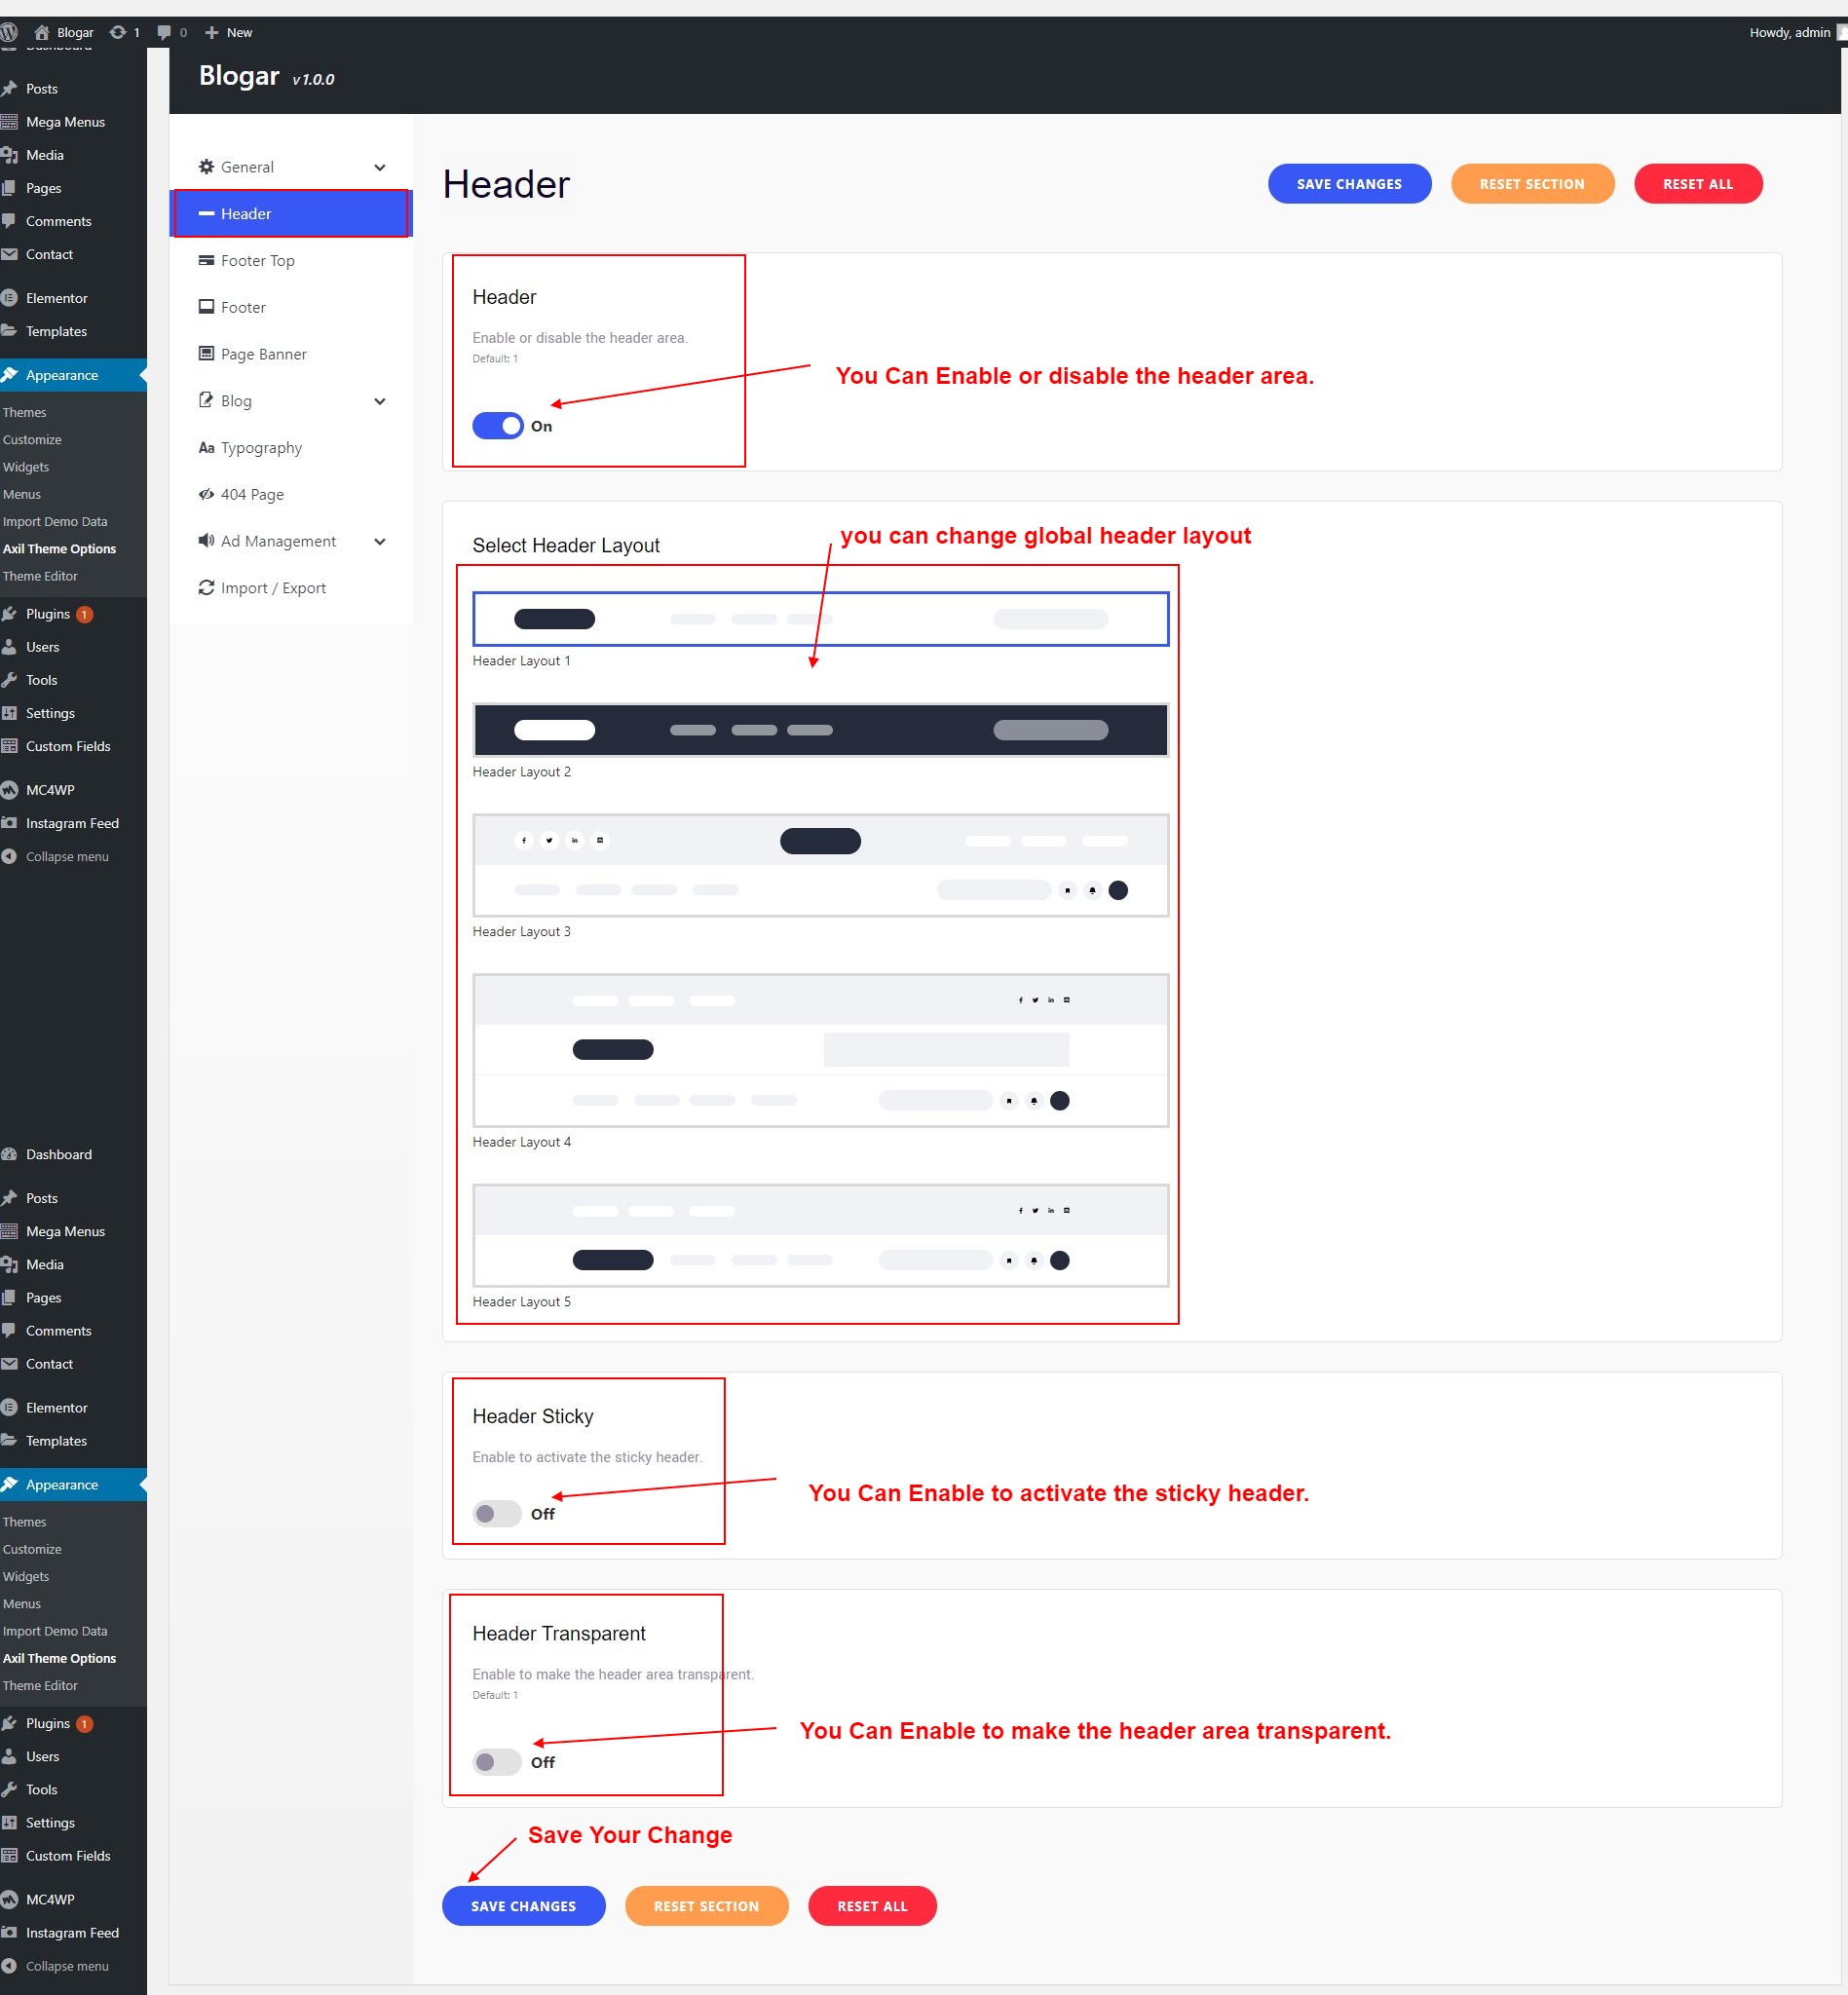
11.2.1 Header
To change Blogar Options navigate to Appearance > Blogar Options.
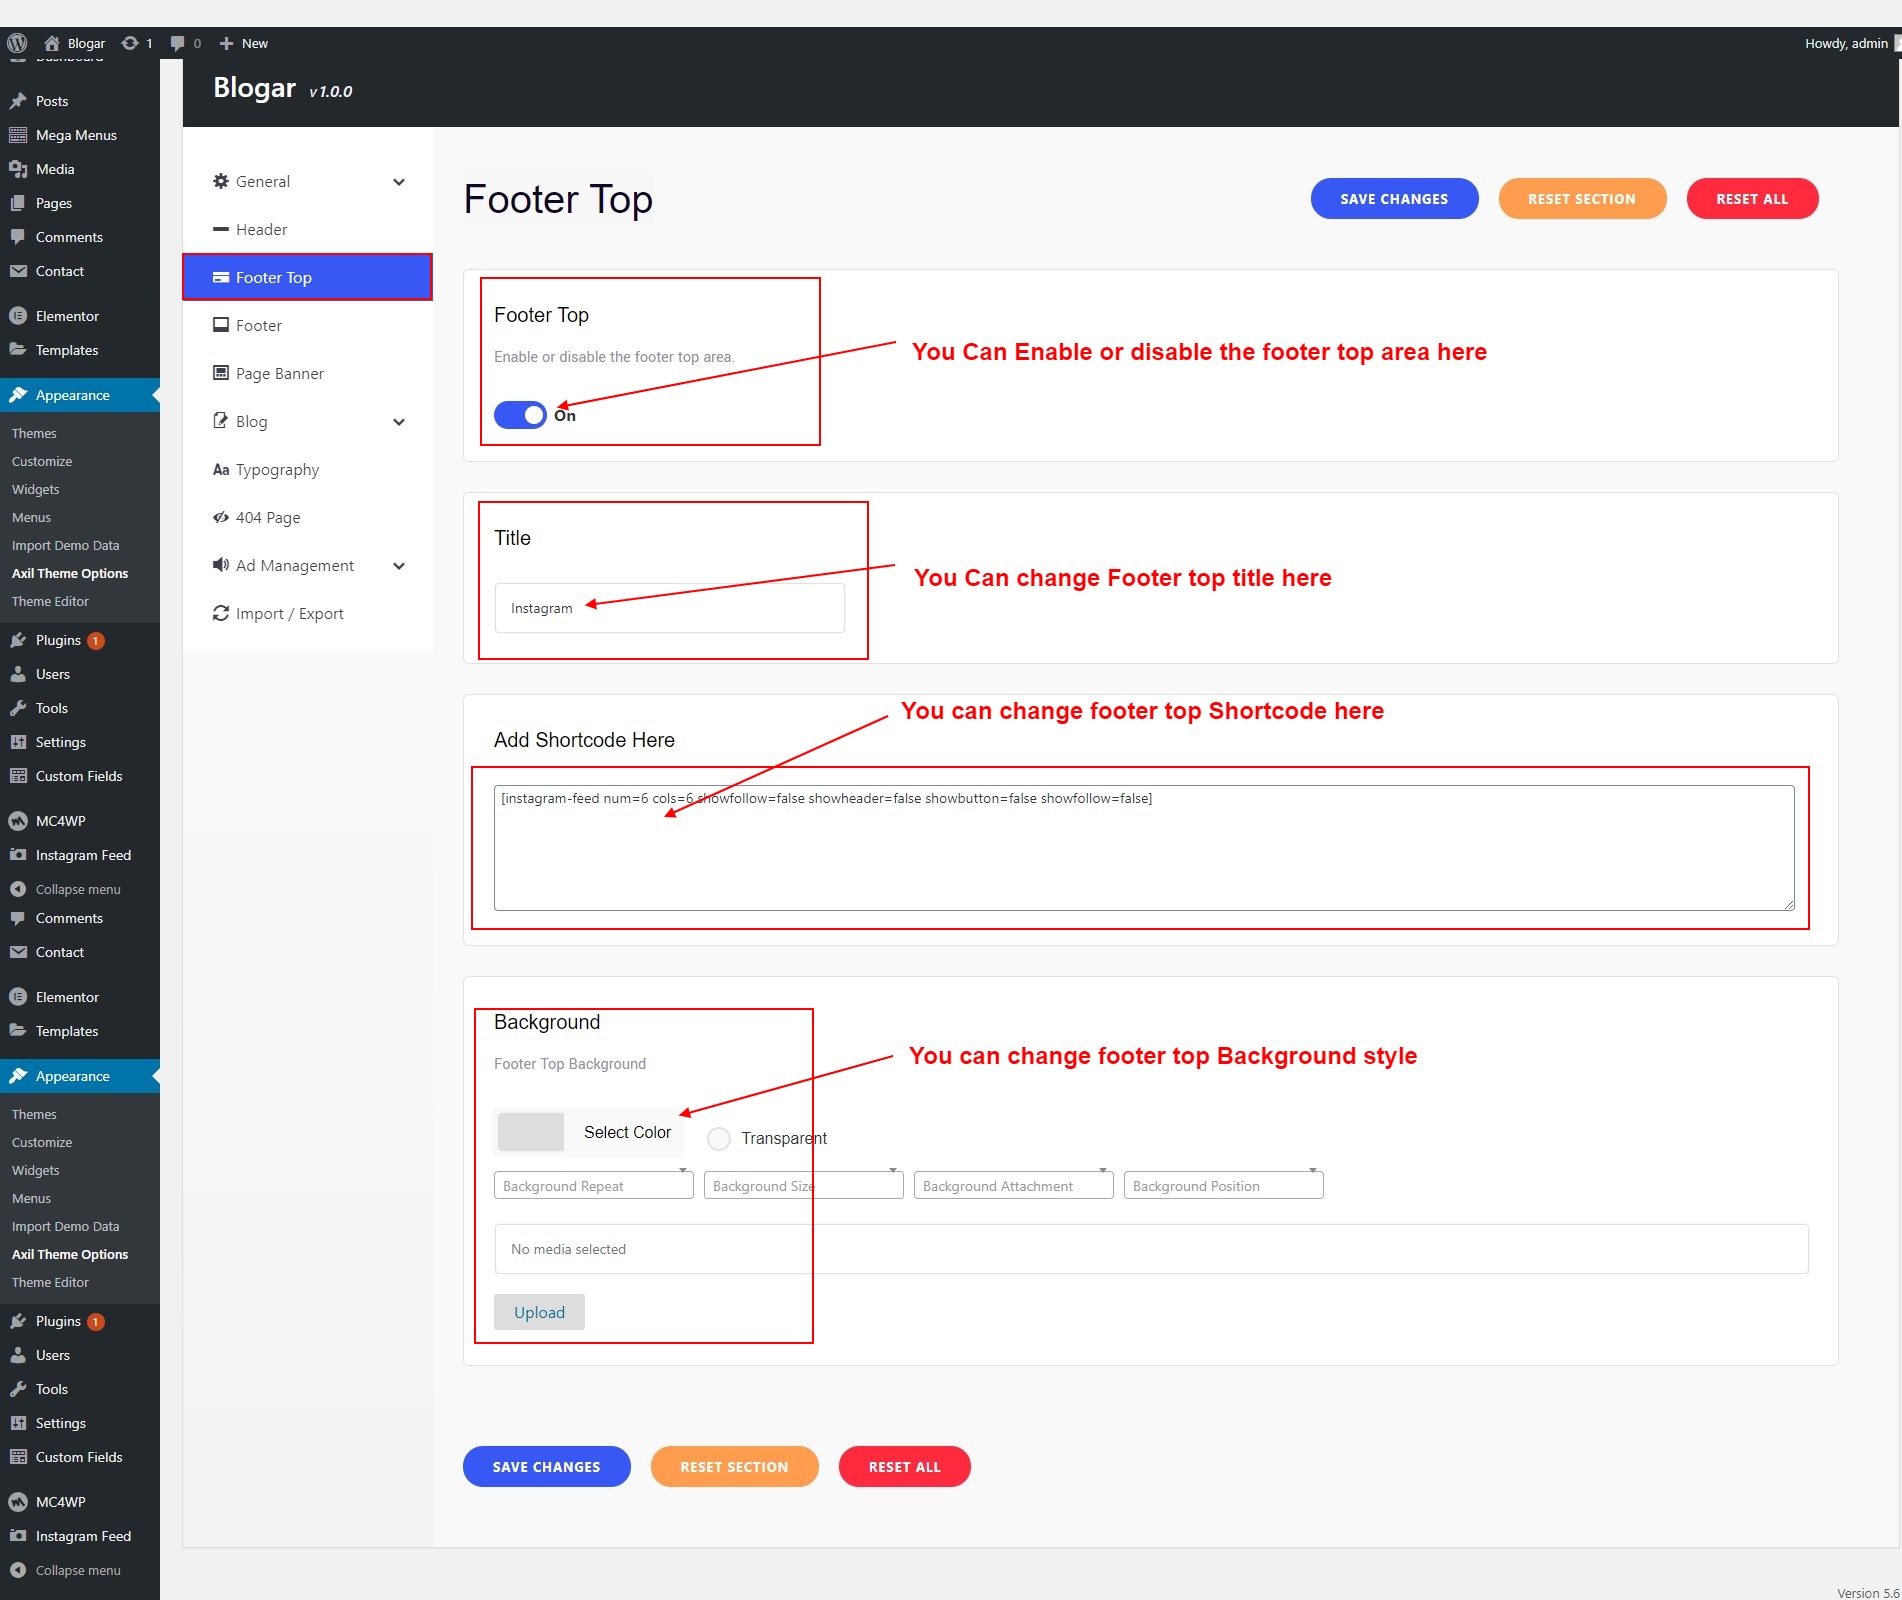
11.3.1 Footer Top
To change Blogar Options navigate to Appearance > Blogar Options.
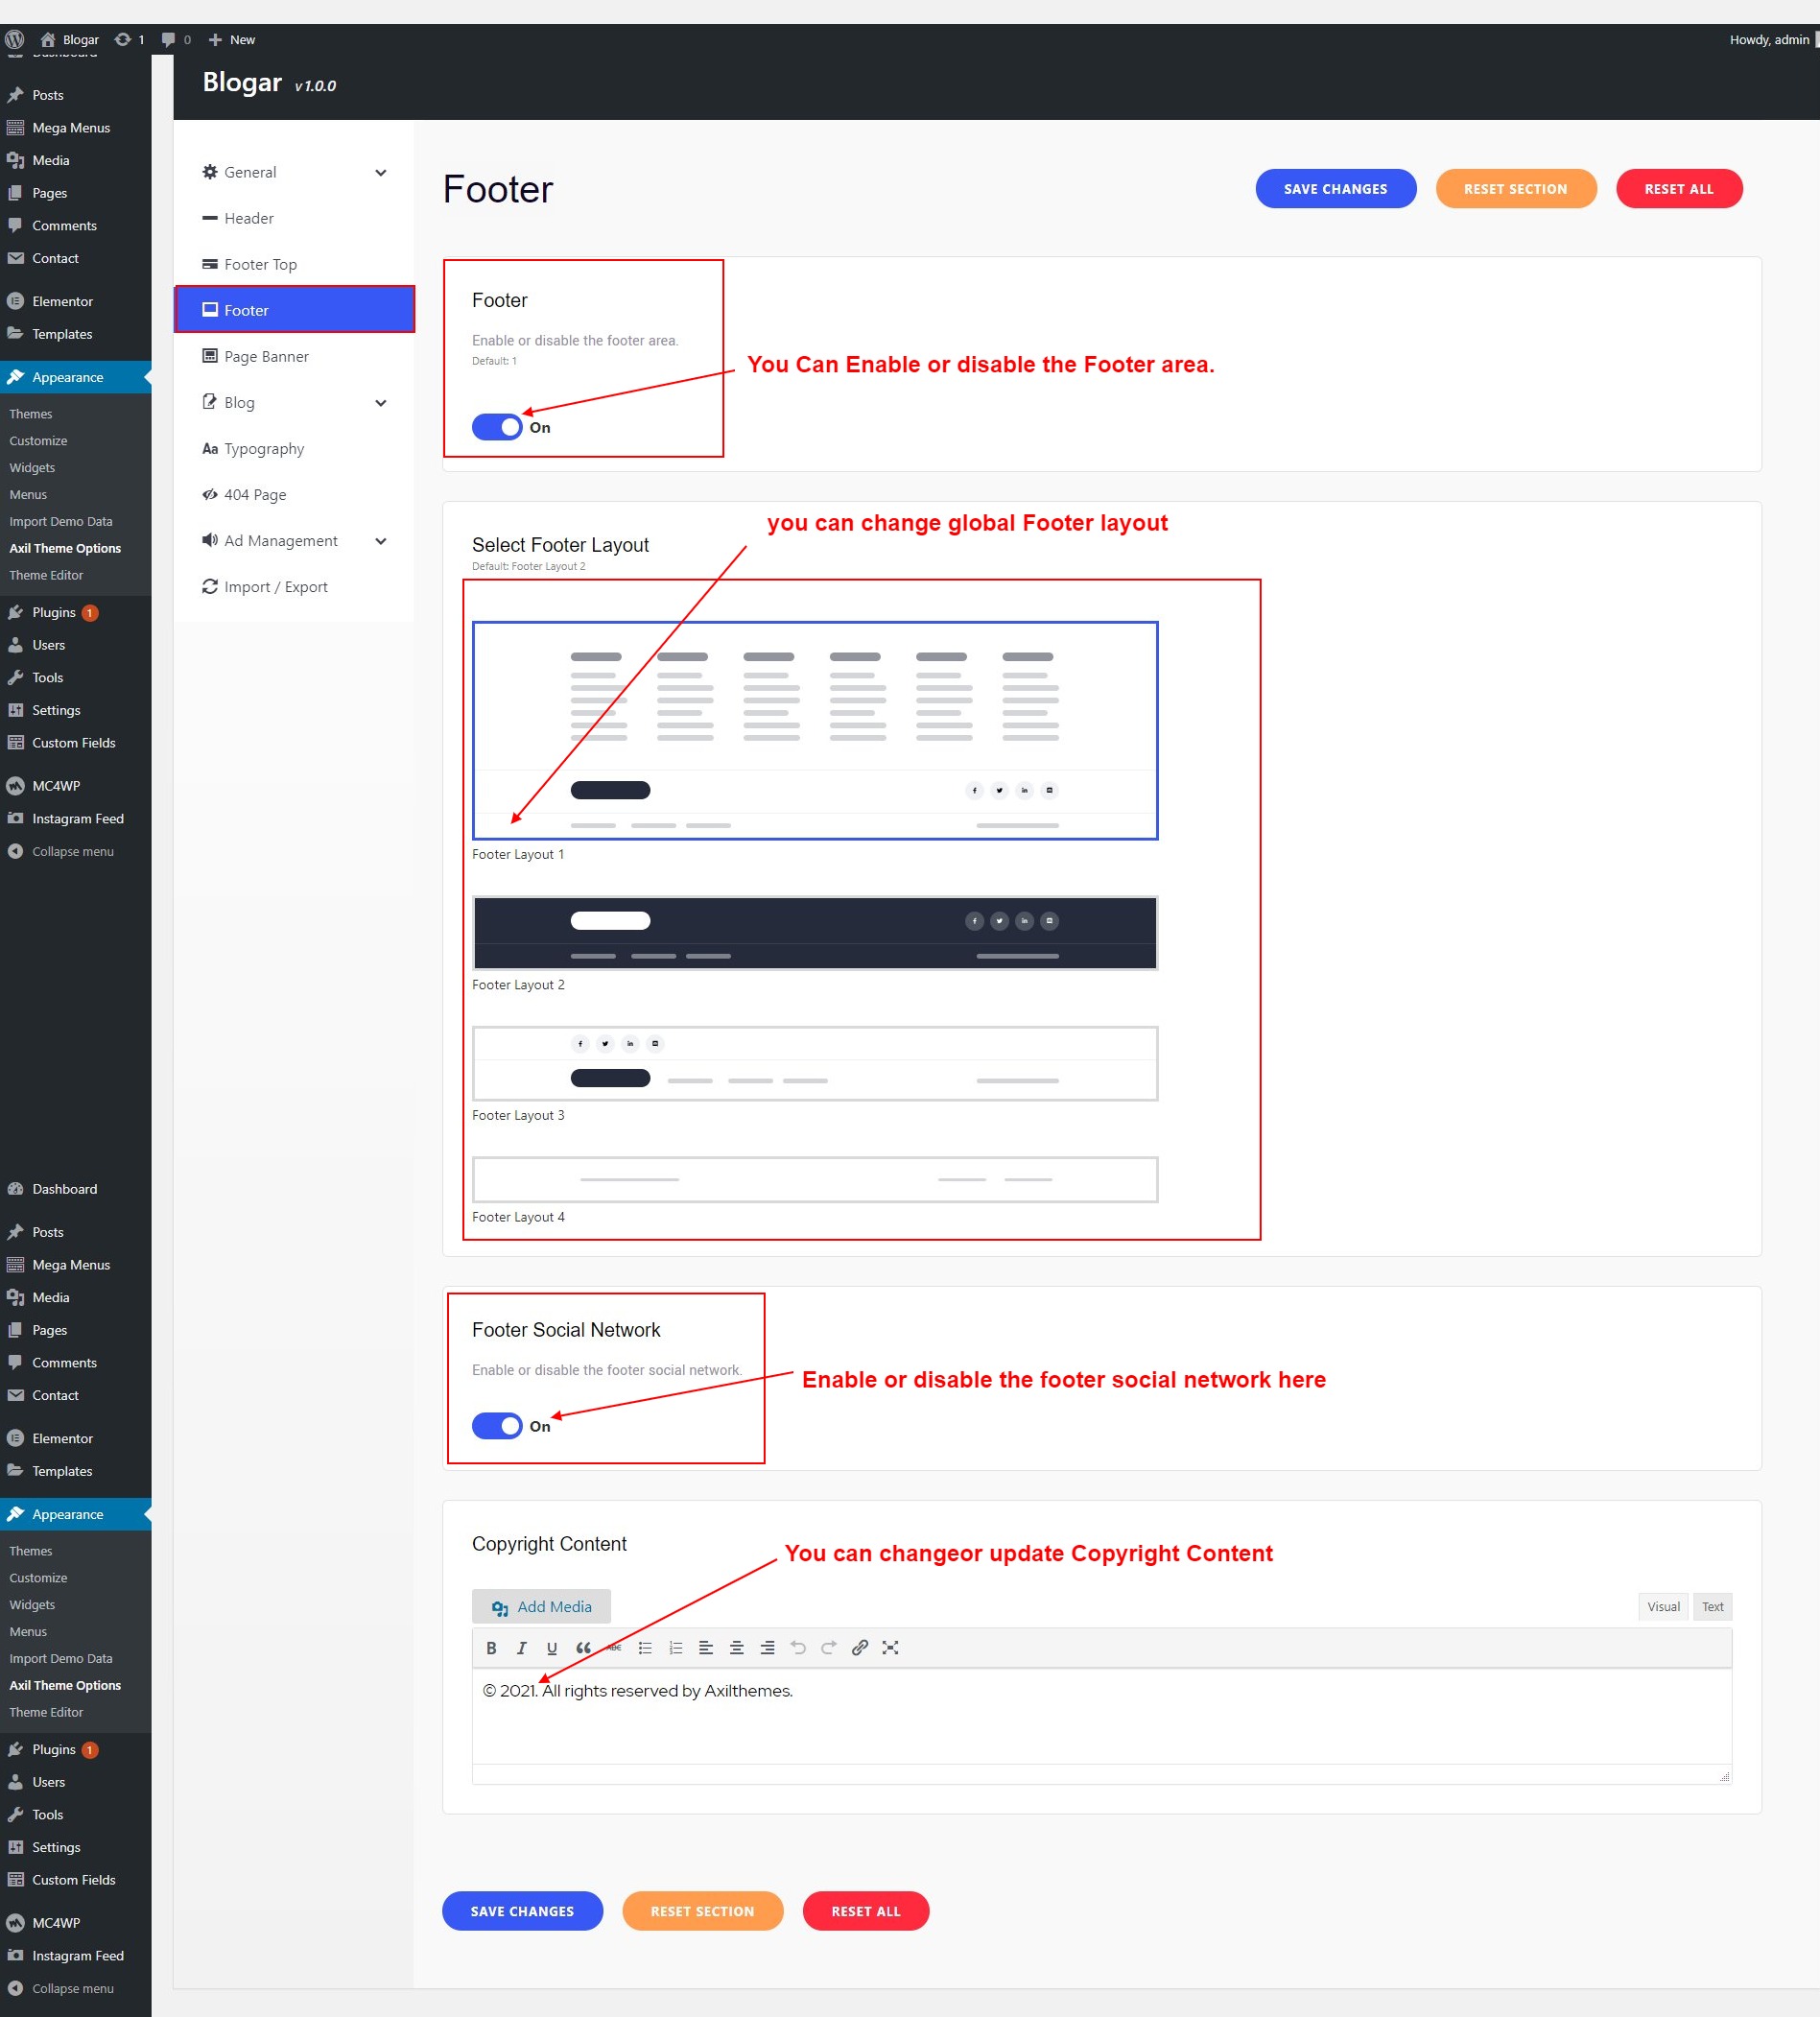
11.3.2 Footer
To change Blogar Options navigate to Appearance > Blogar Options.
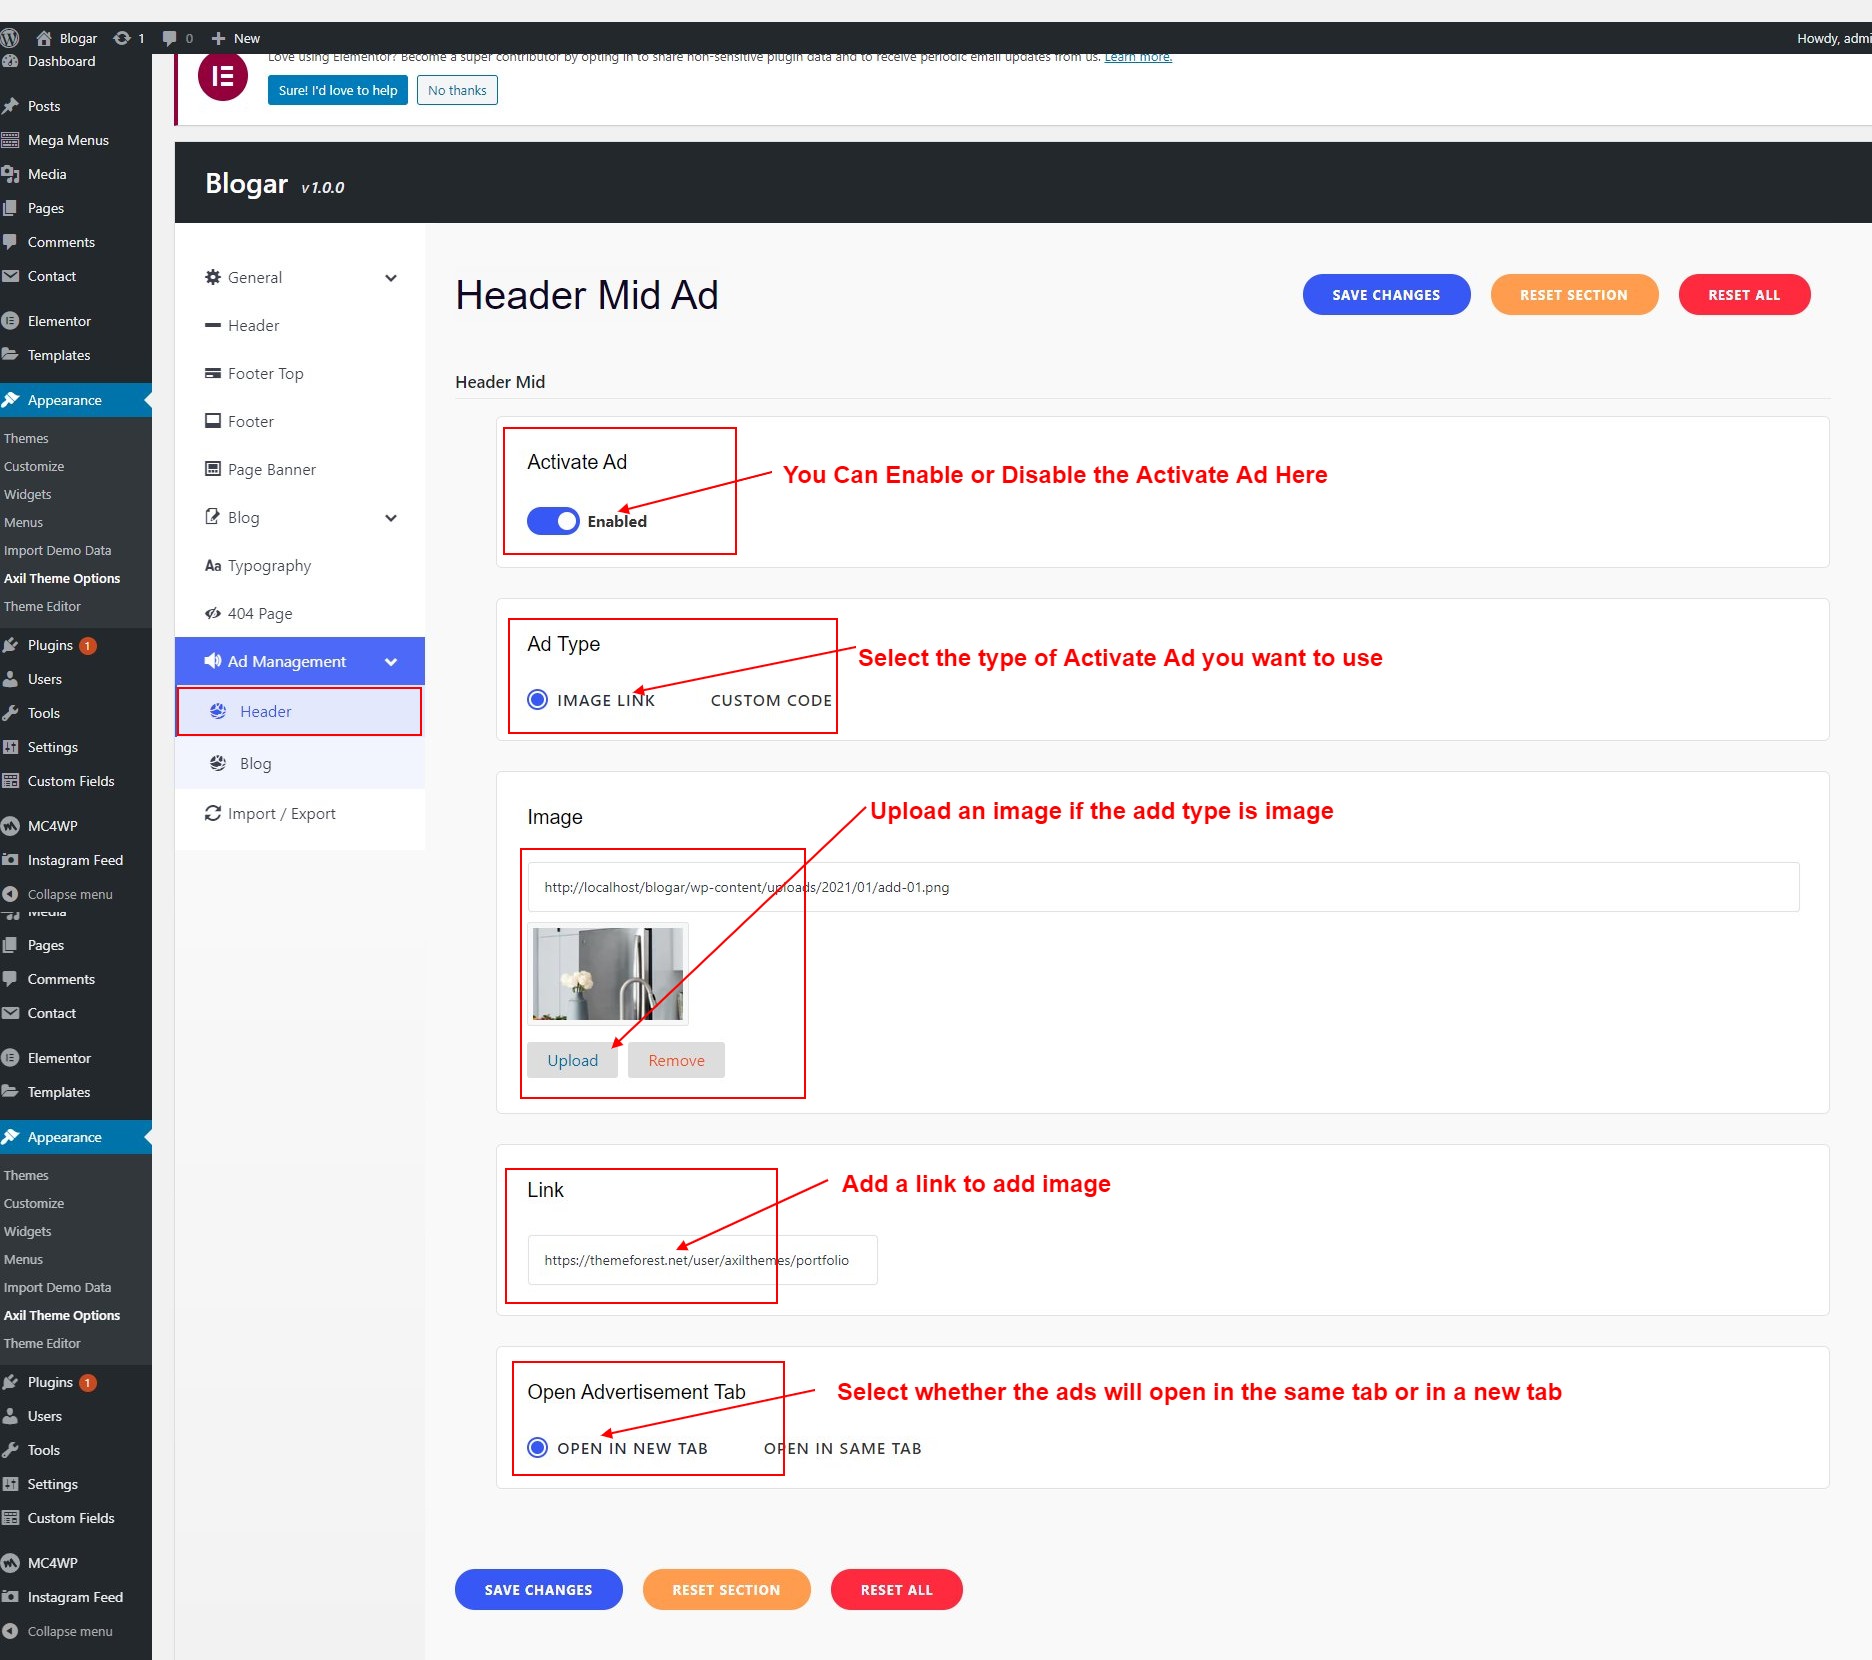
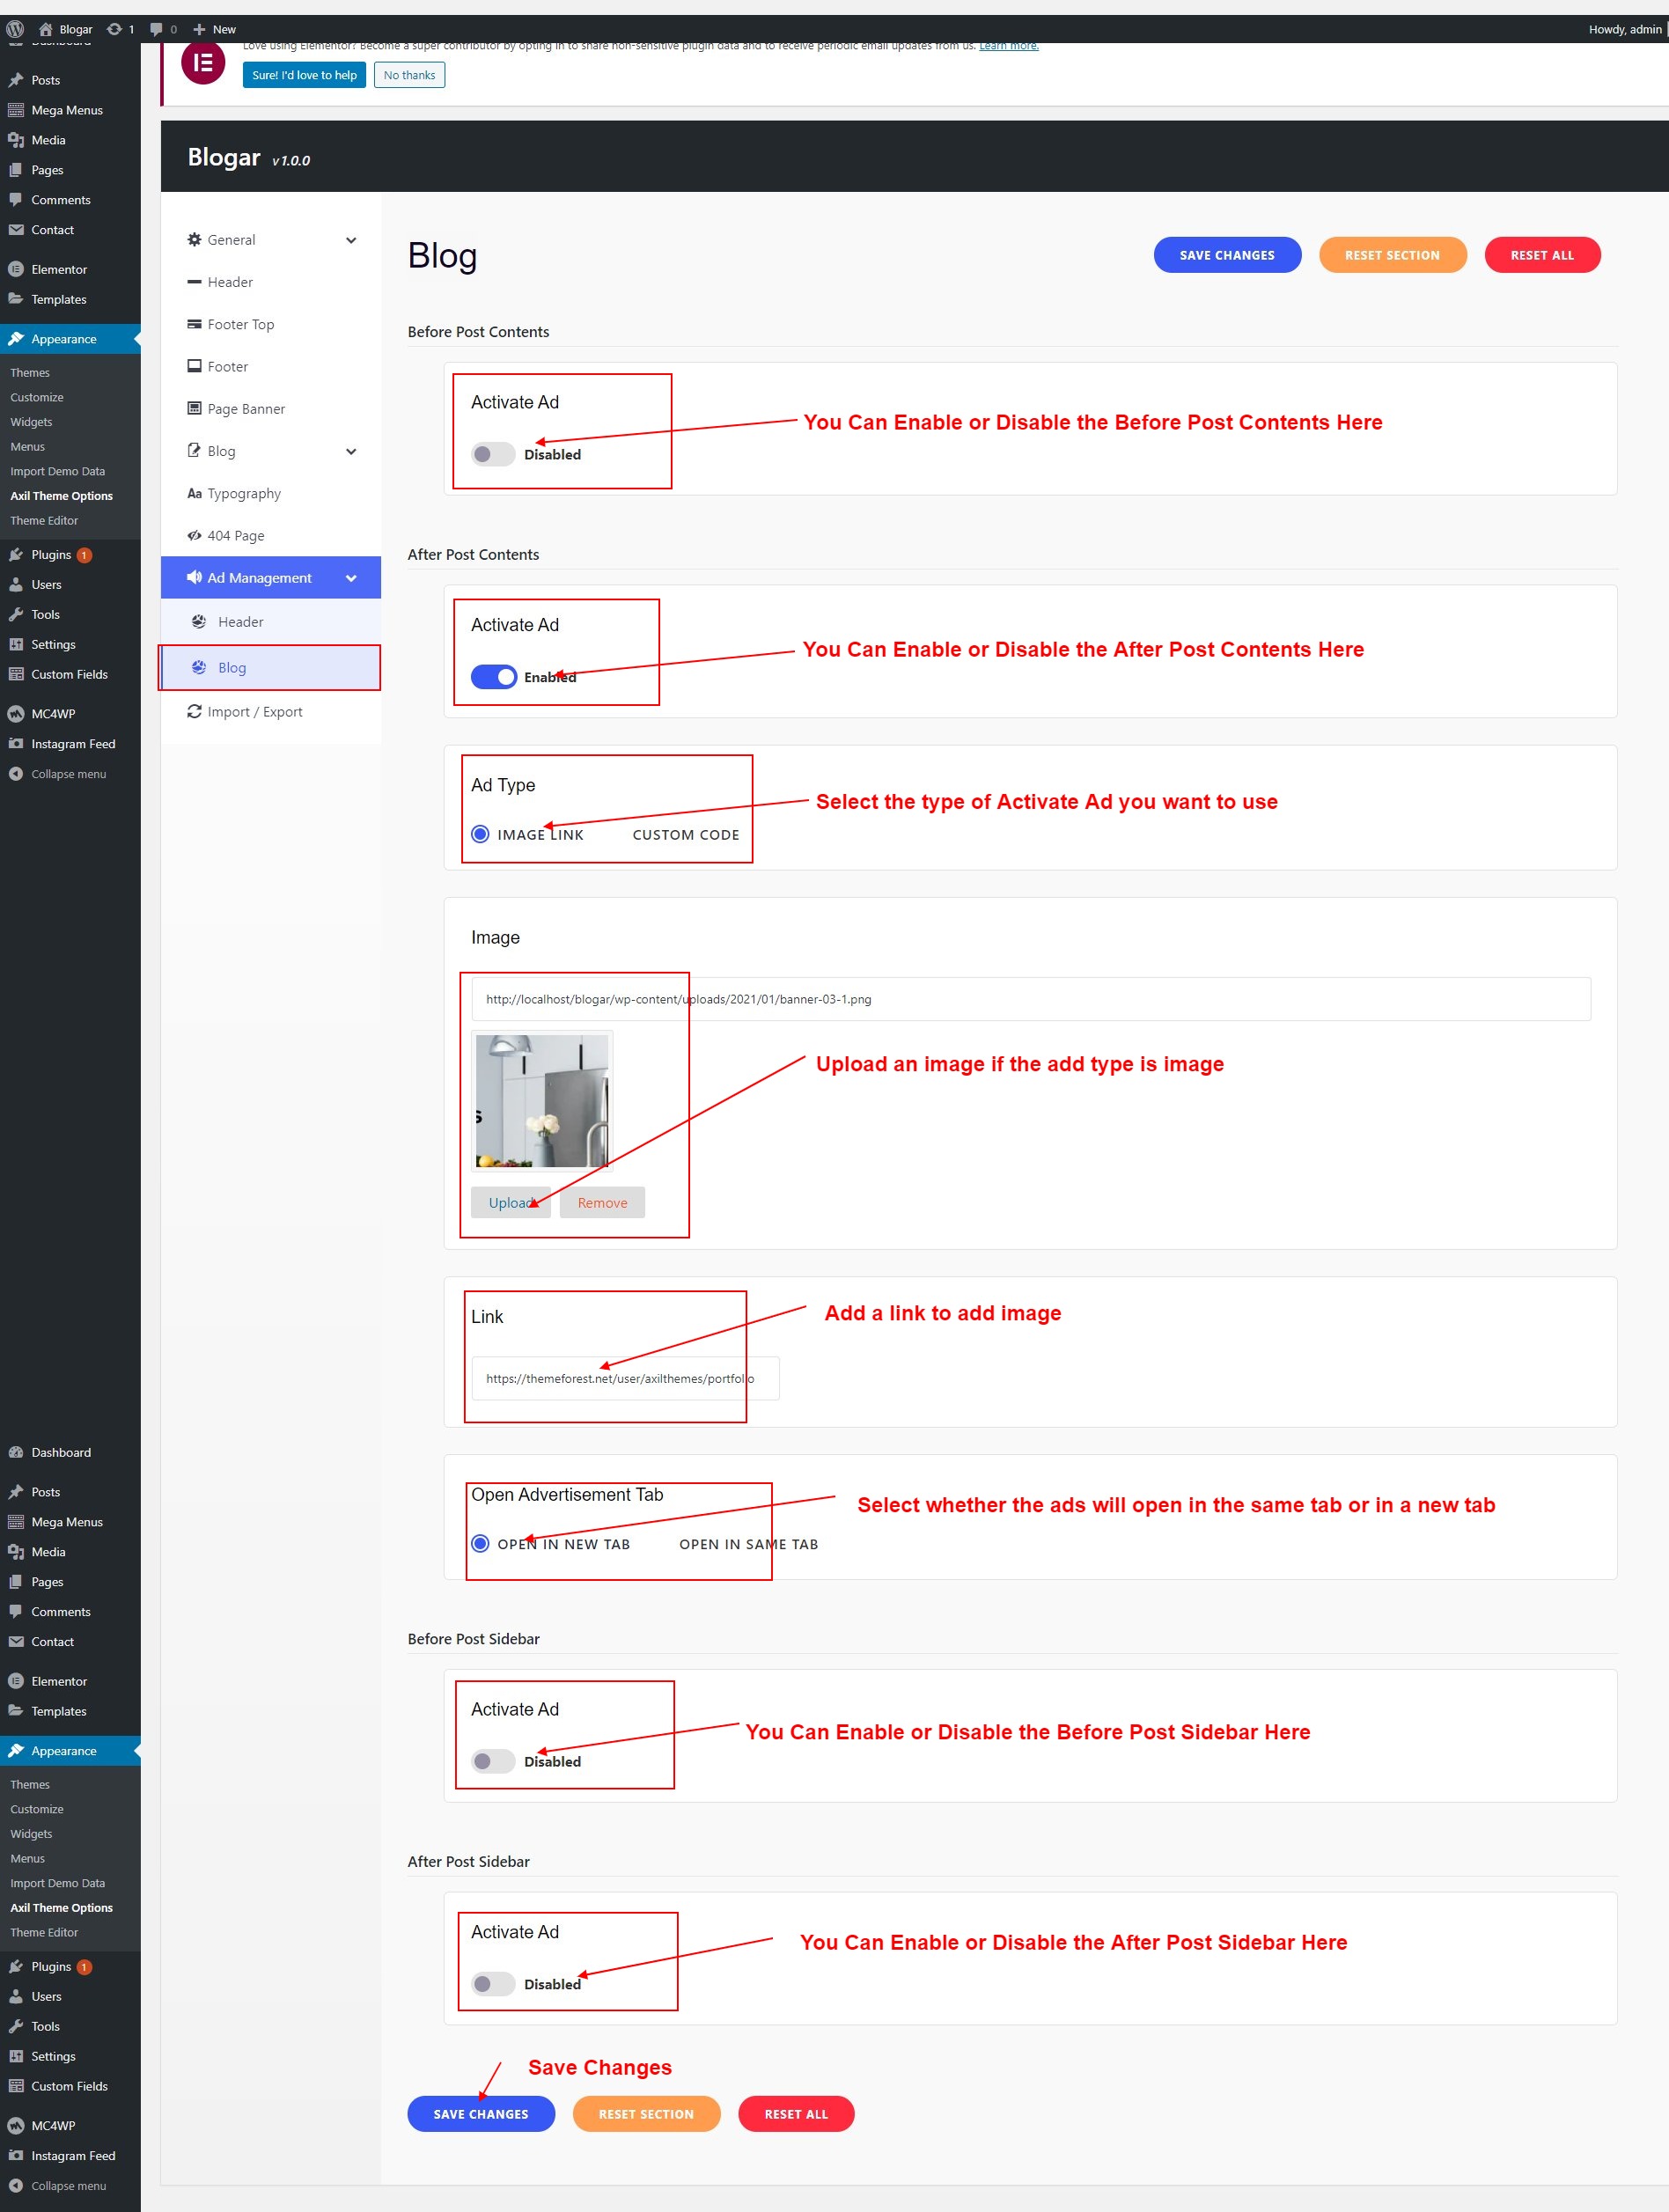
11.4 Ads Management (Header/Blog/Archive)
To change Blogar Options navigate to Appearance > Blogar Options.
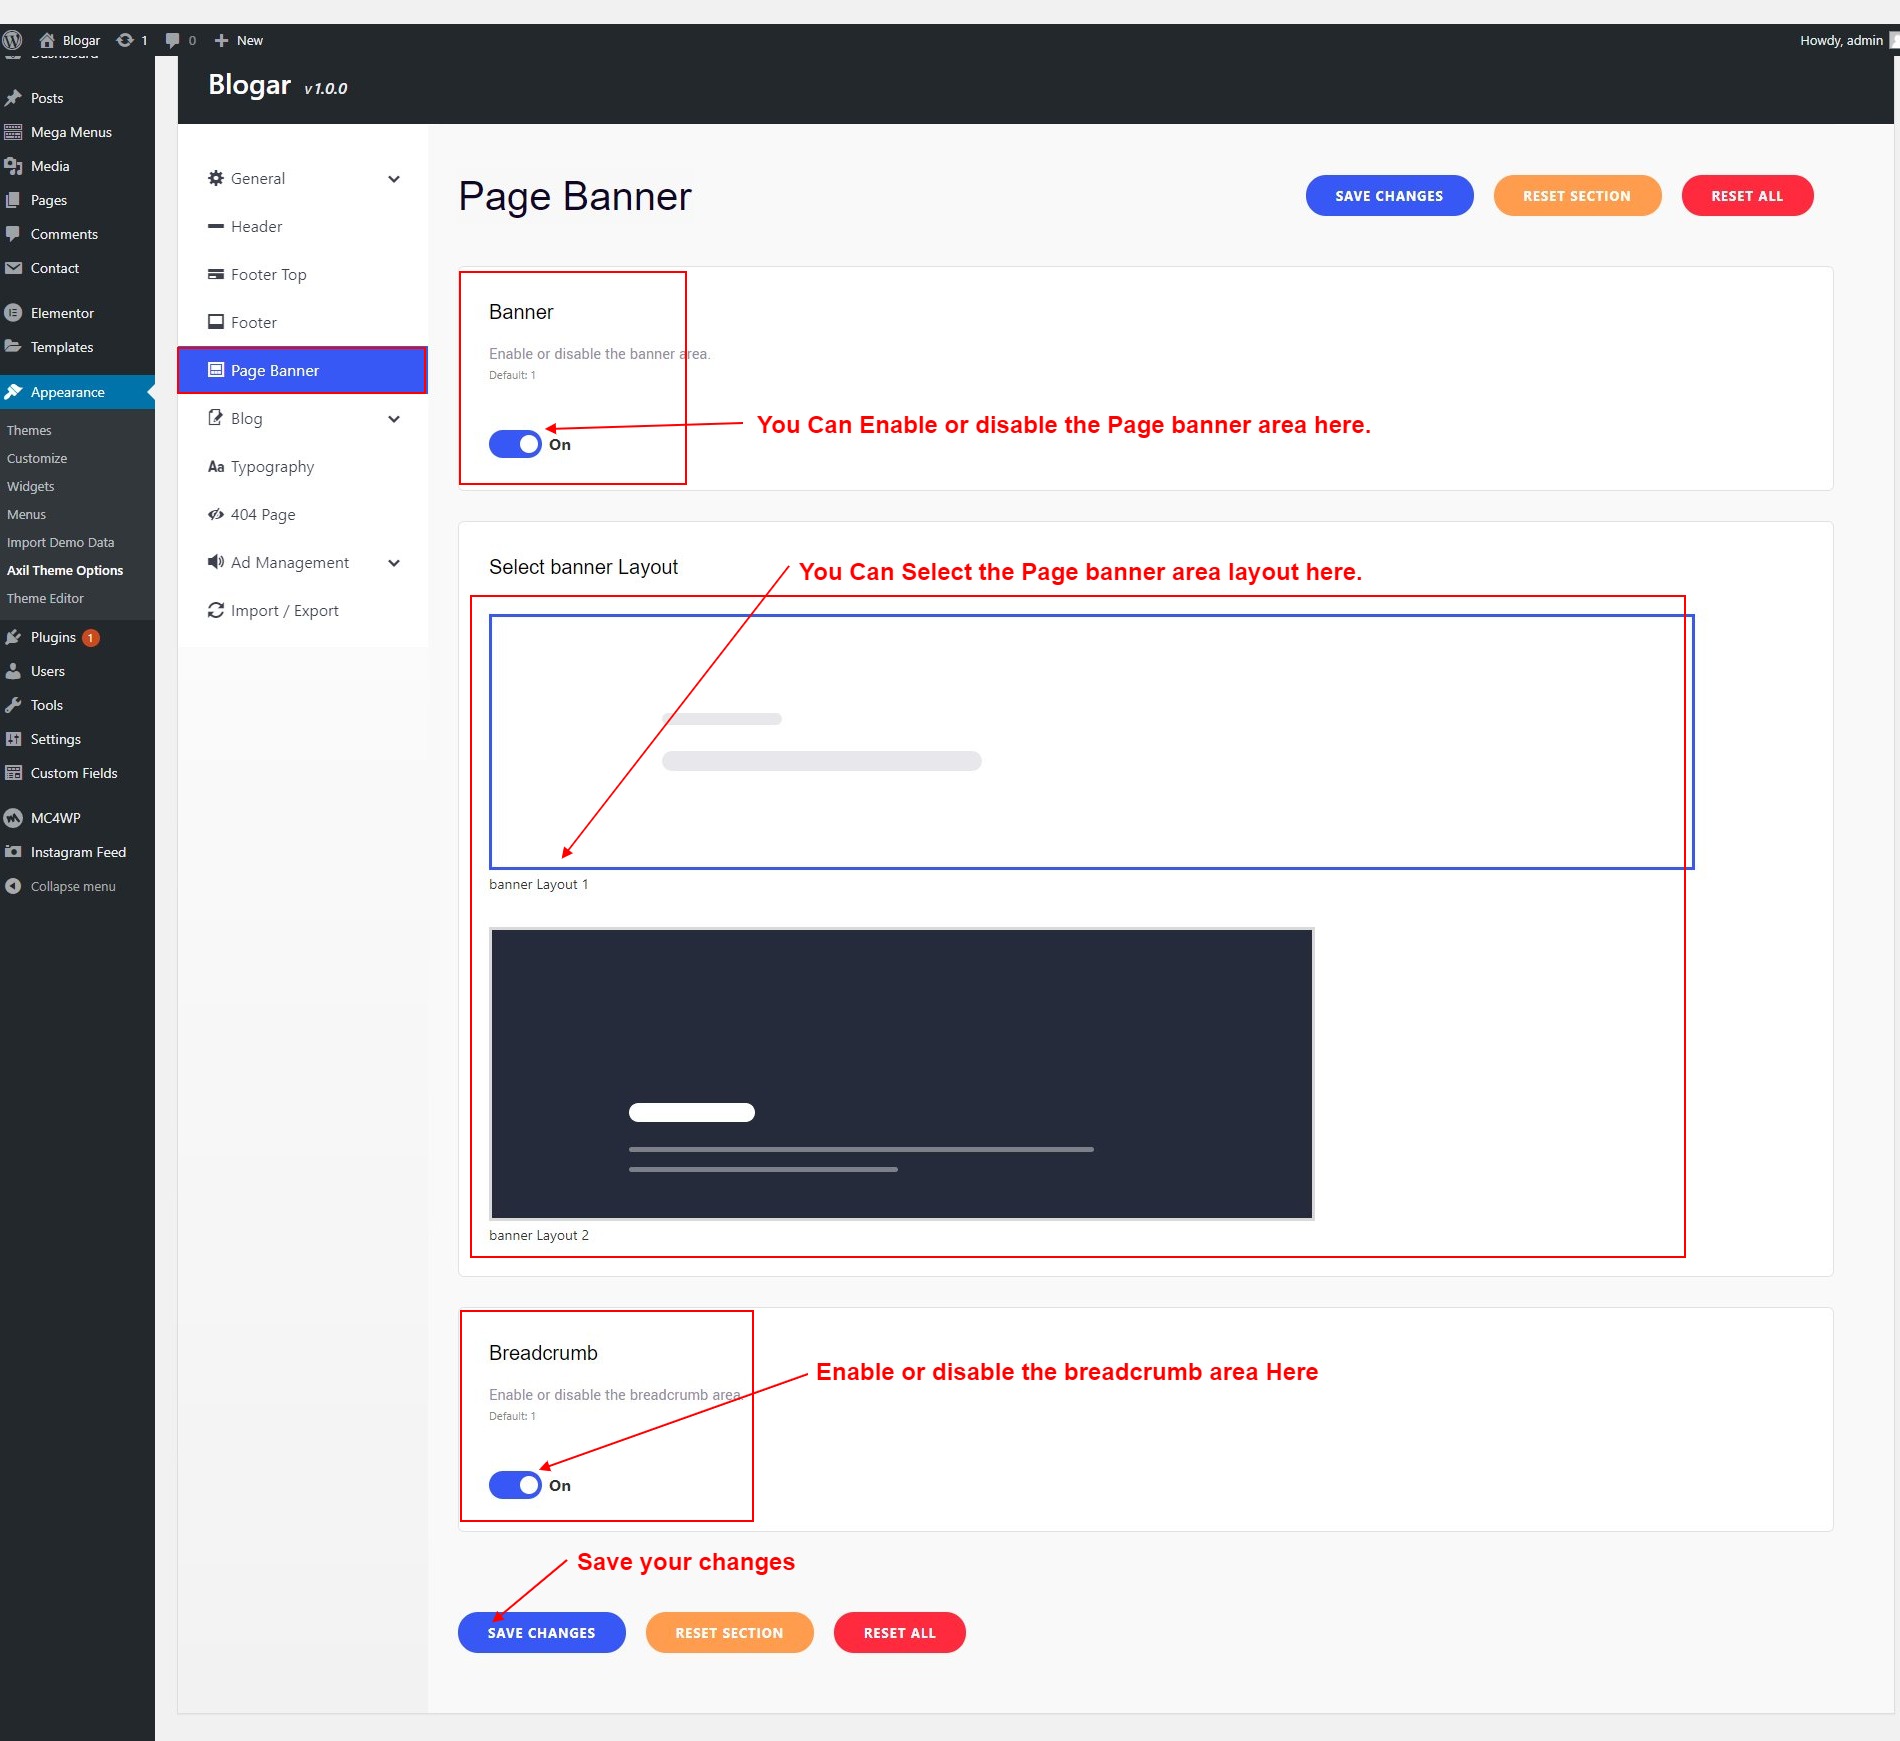
11.5 Page Banner
To change Blogar Options navigate to Appearance > Blogar Options.
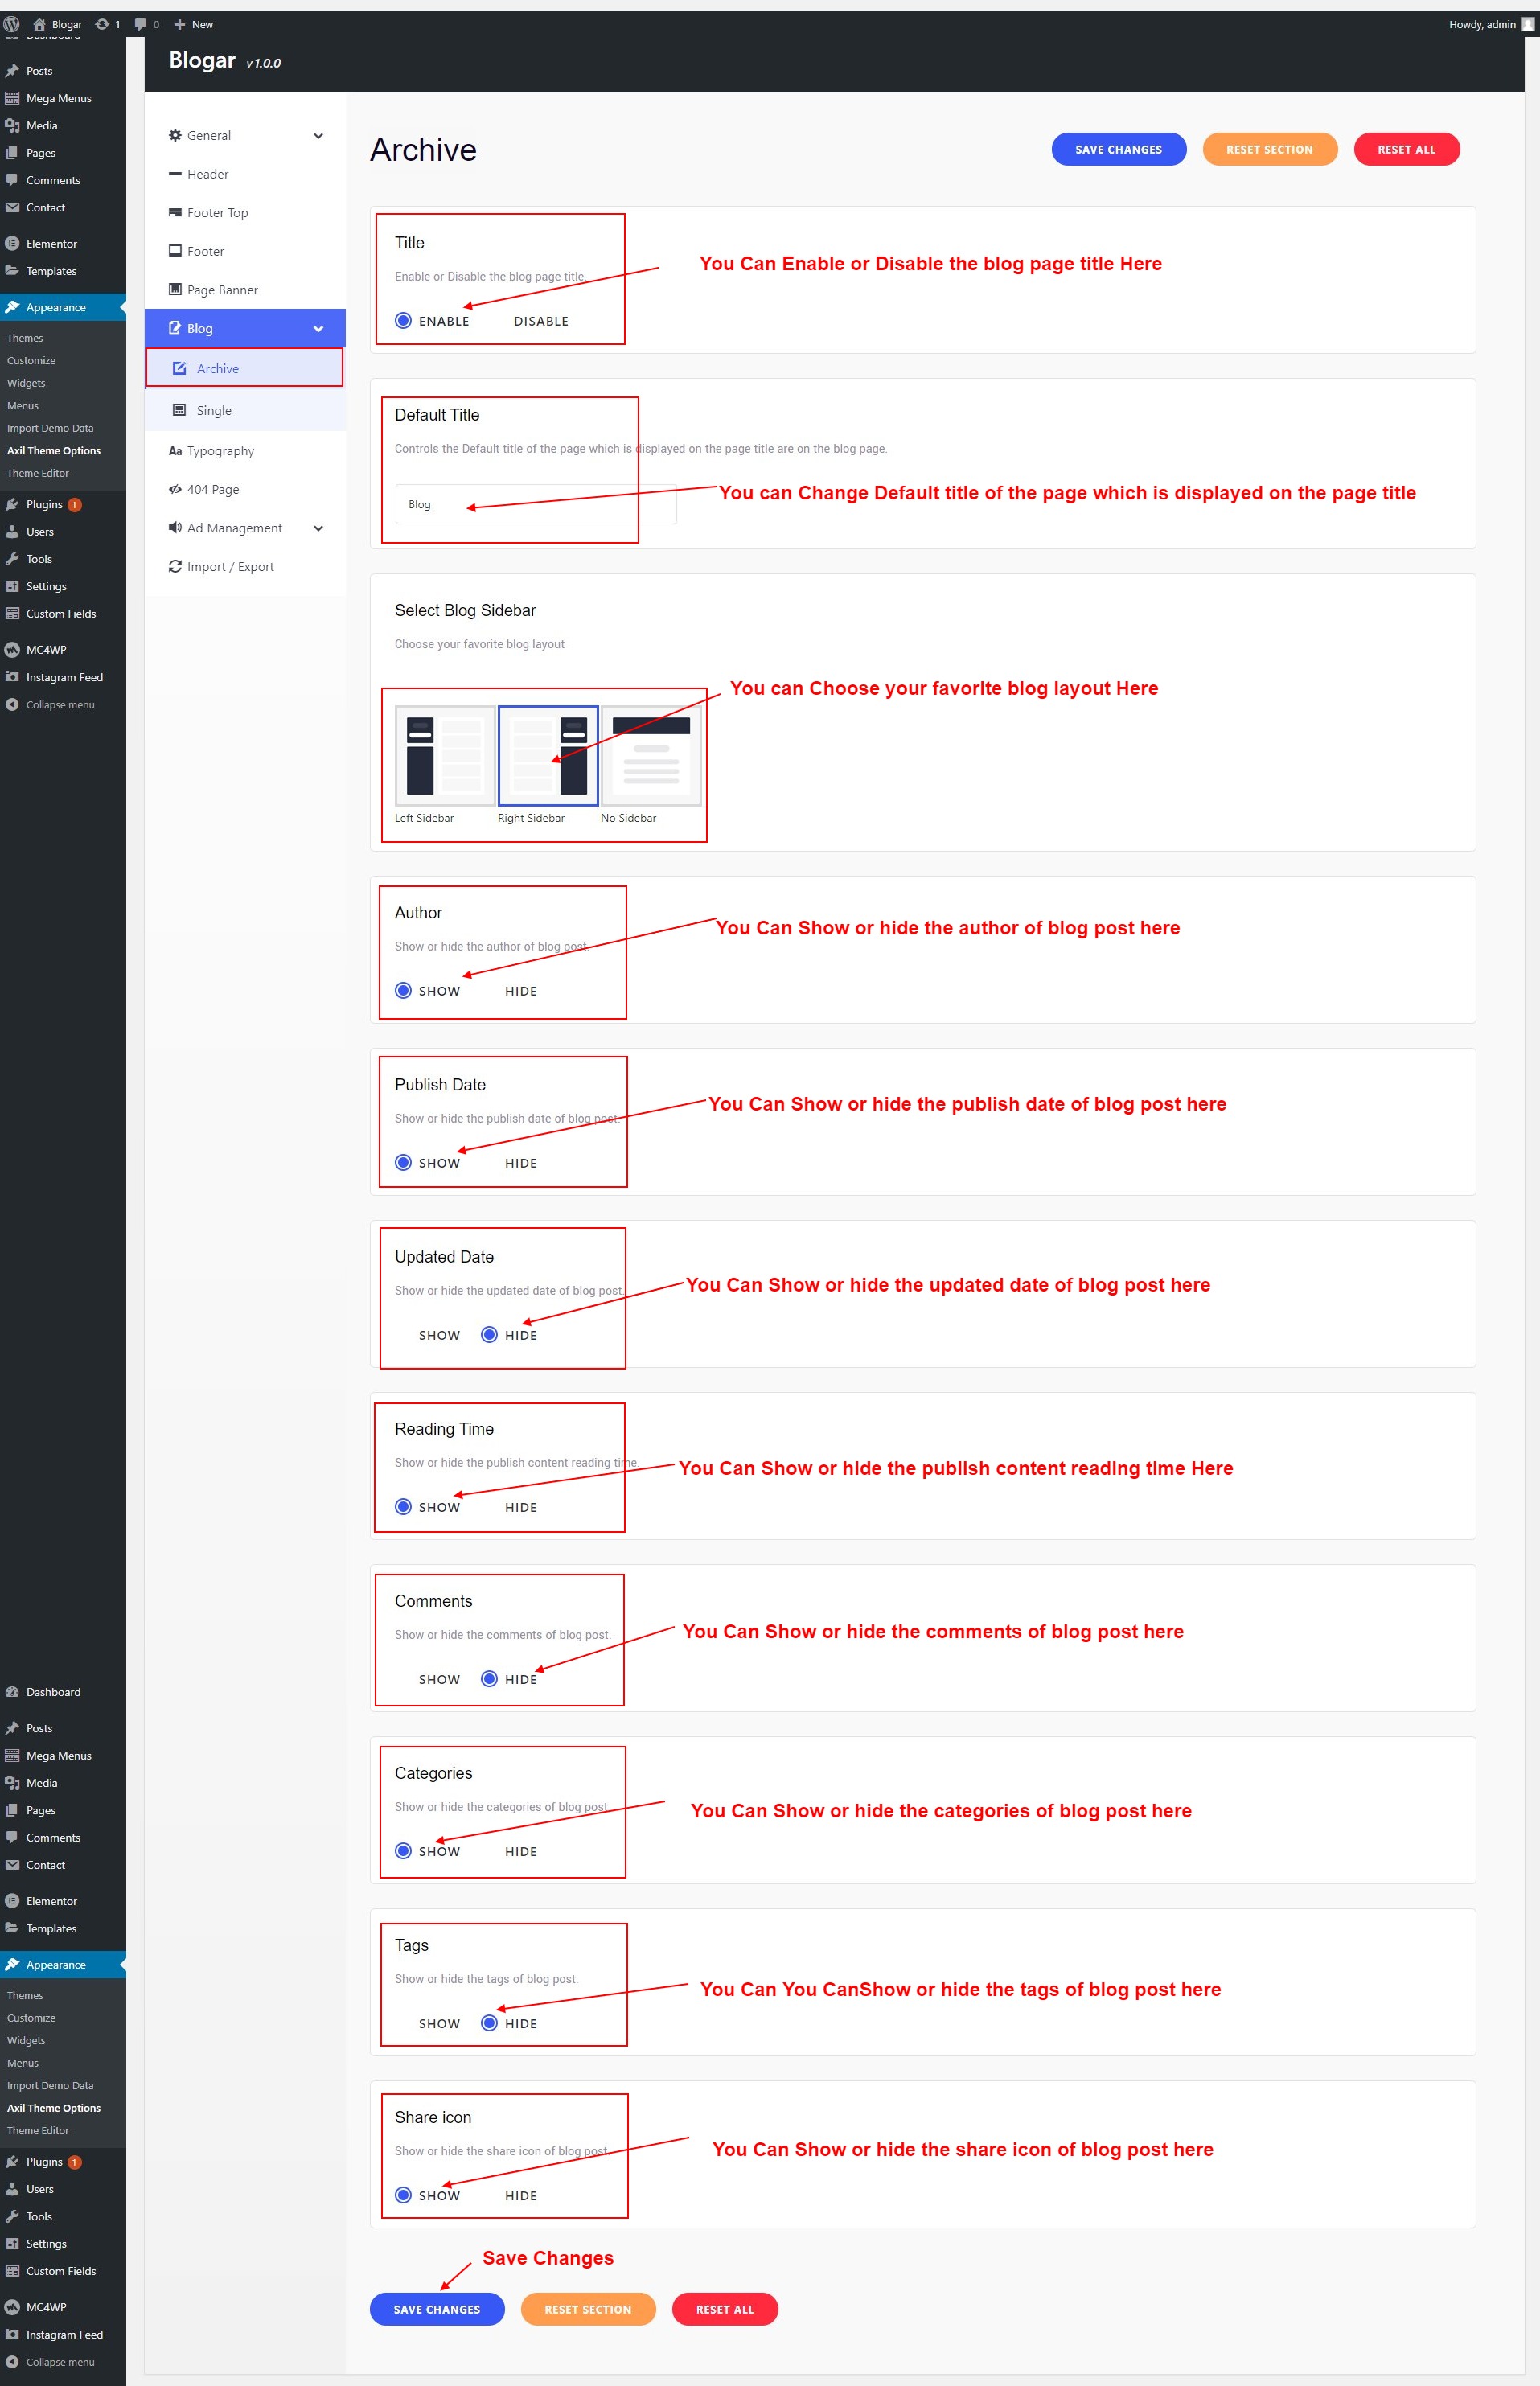
11.6 Archive (News Archive)
To change Blogar Options navigate to Appearance > Blogar Options.
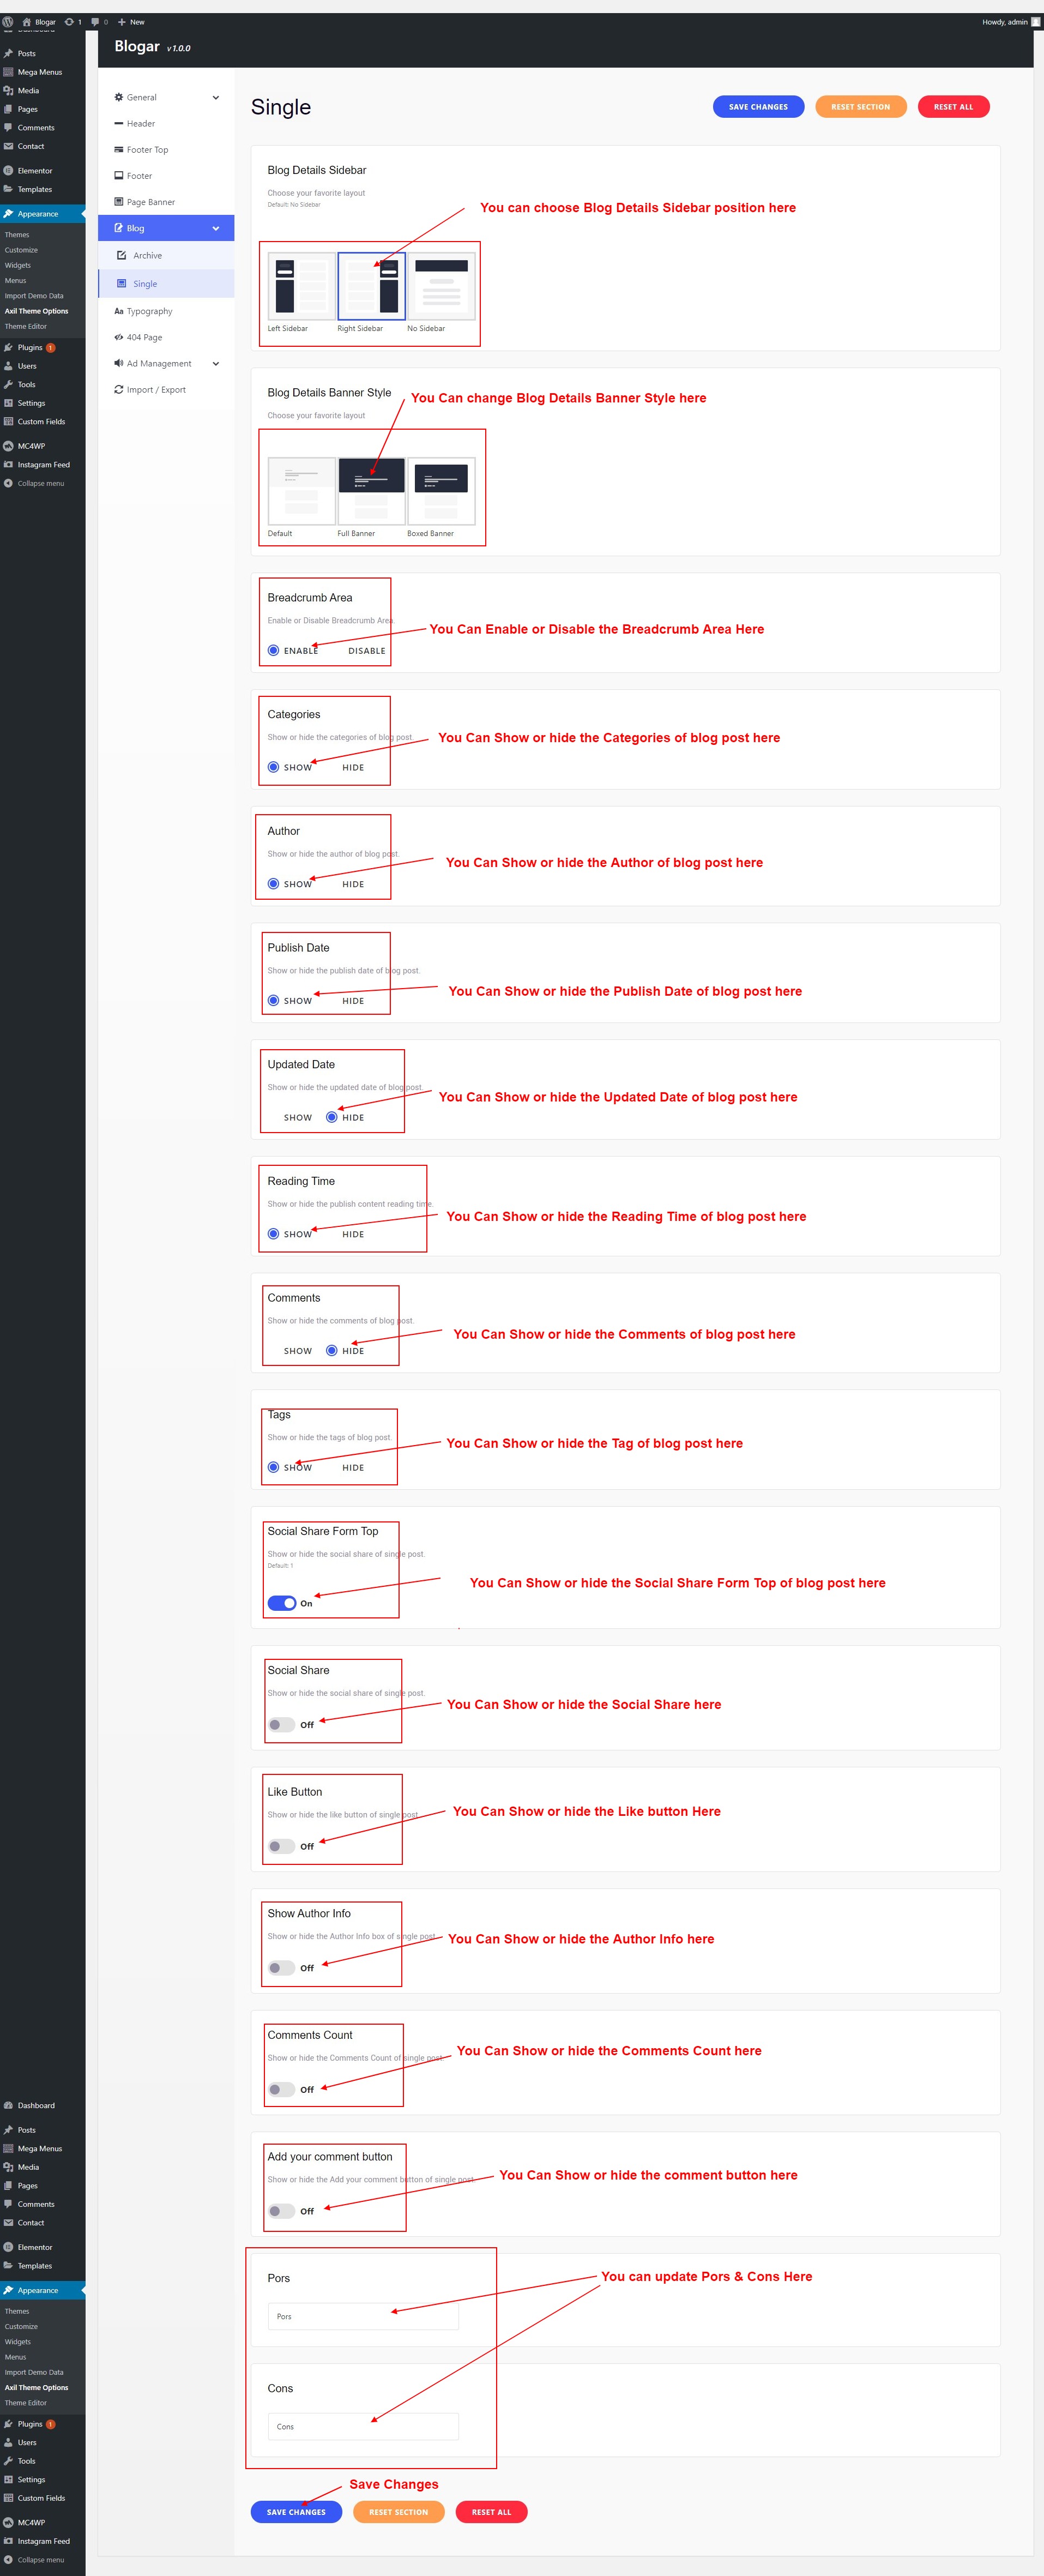
11.6.1 Blog Single
To change Blogar Options navigate to Appearance > Blogar Options.
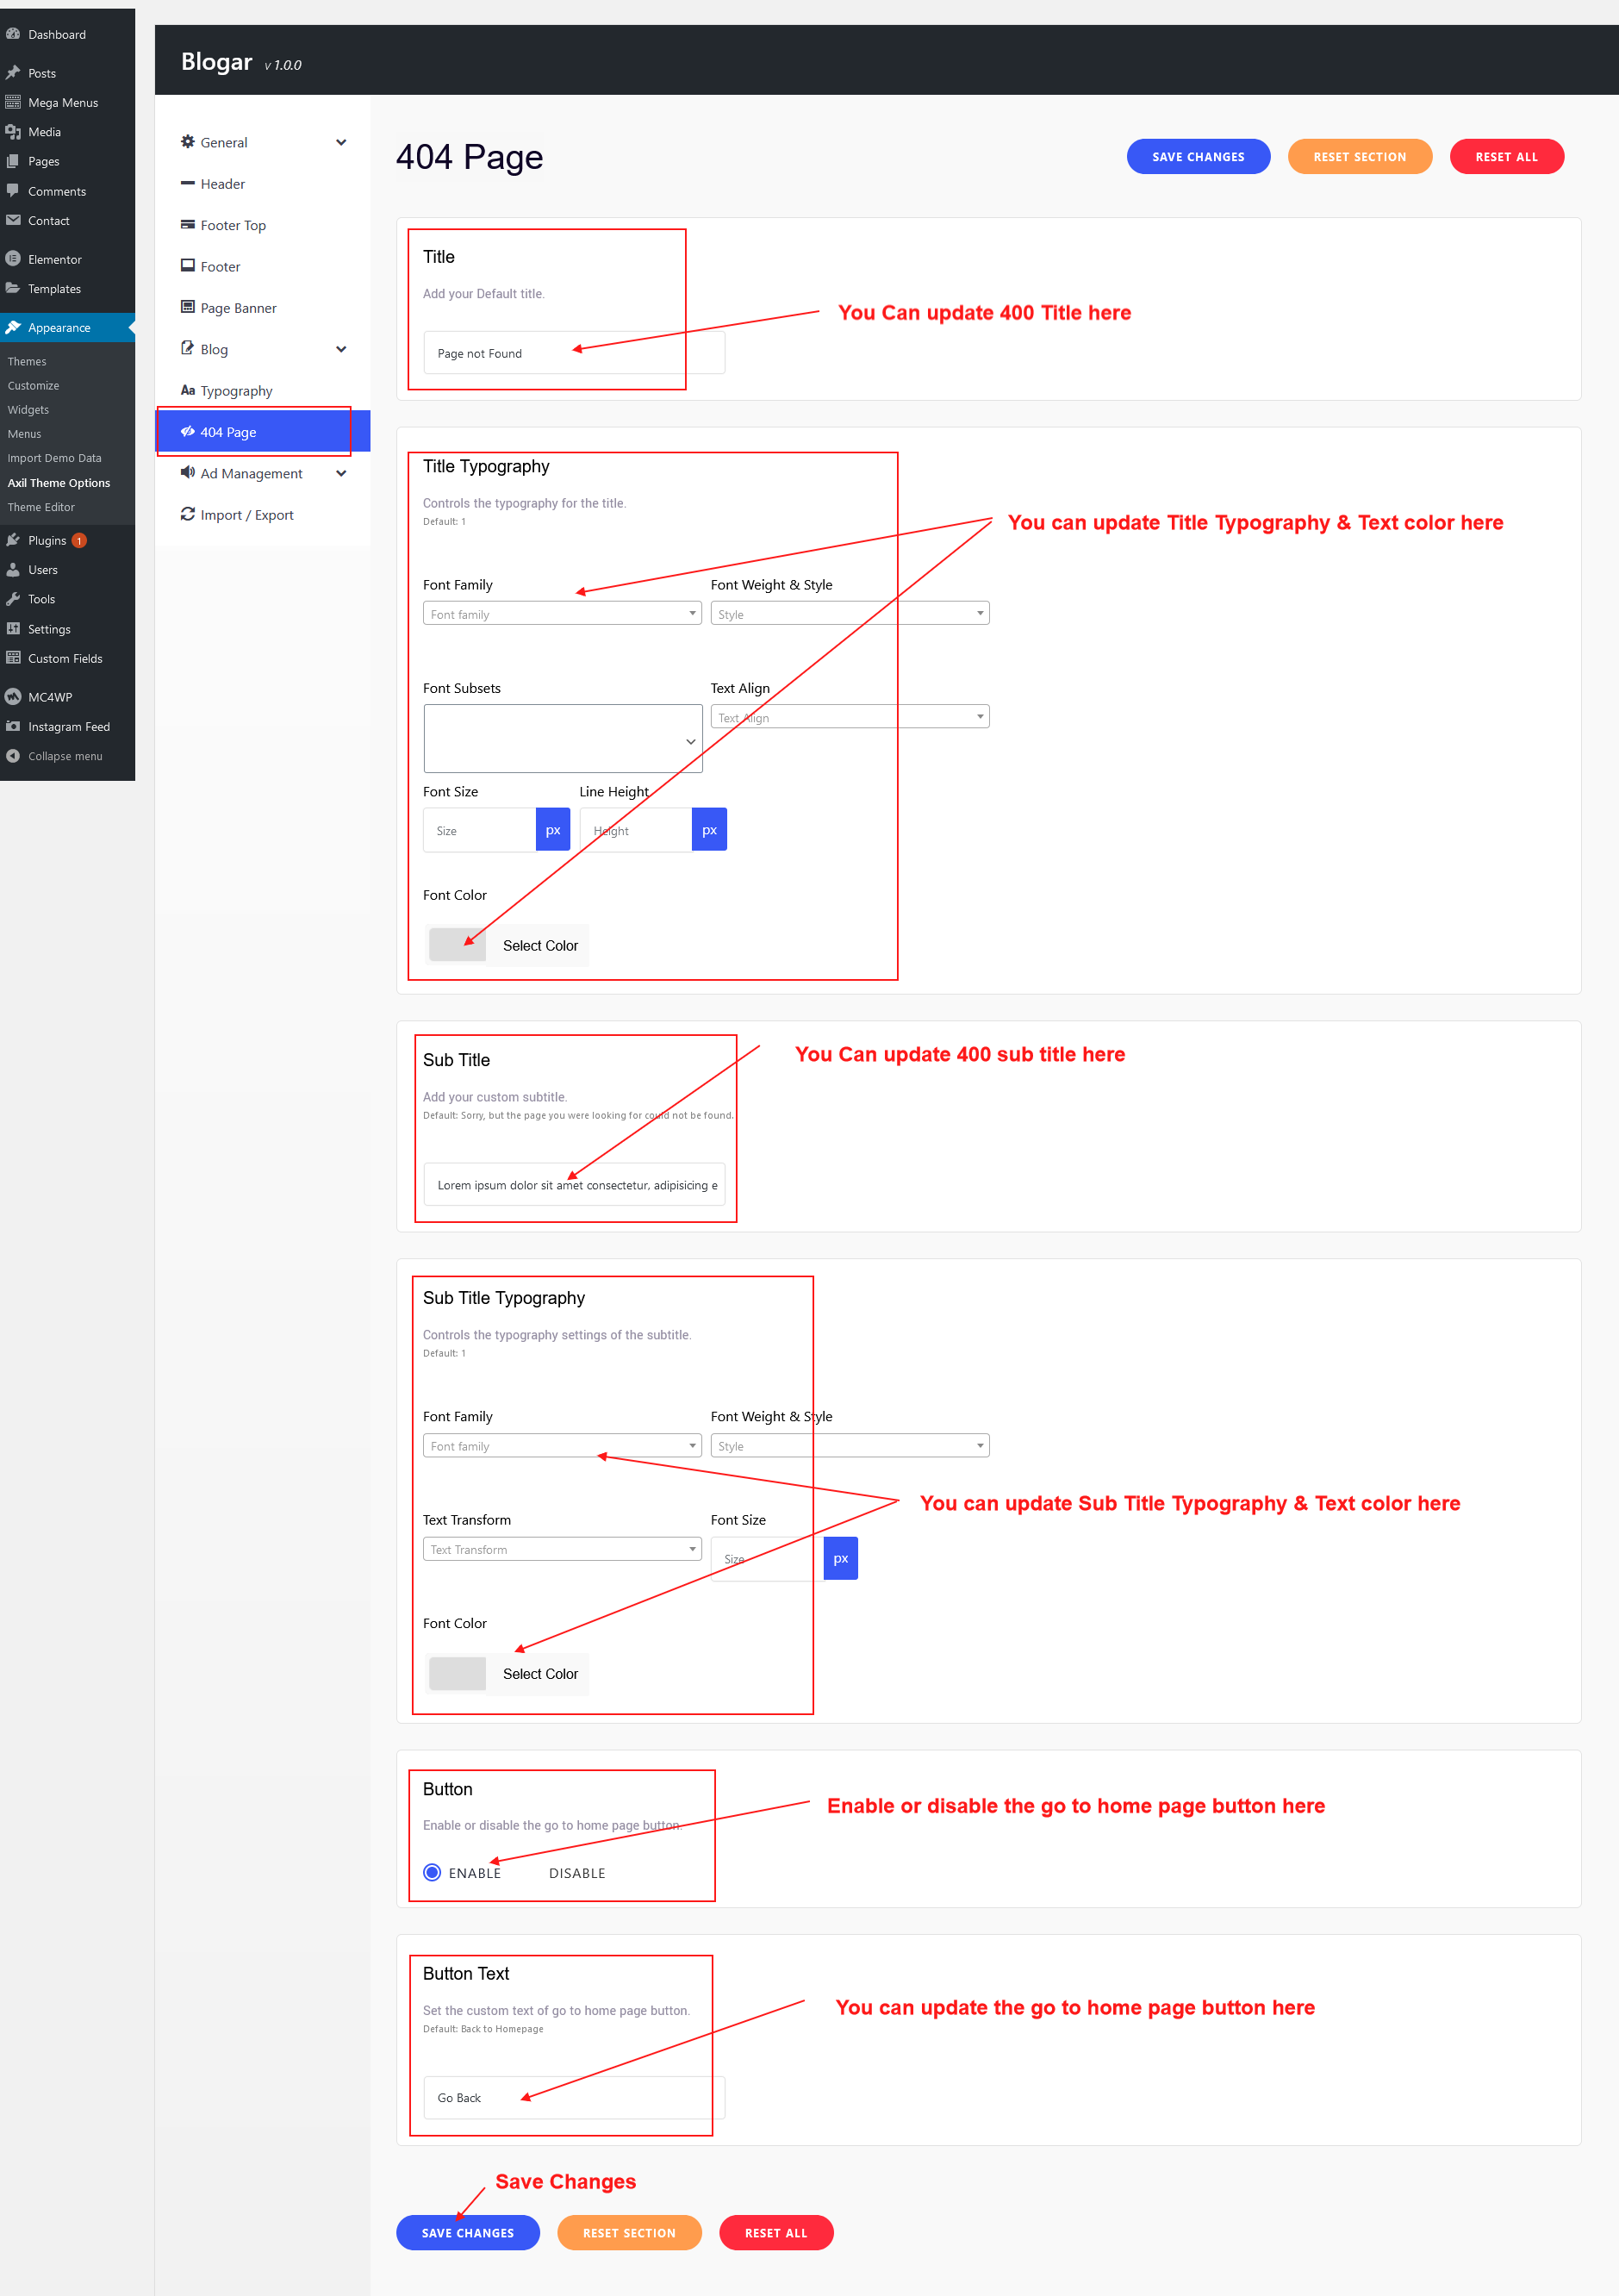
11.7 404 Page
To change Blogar Options navigate to Appearance > Blogar Options.
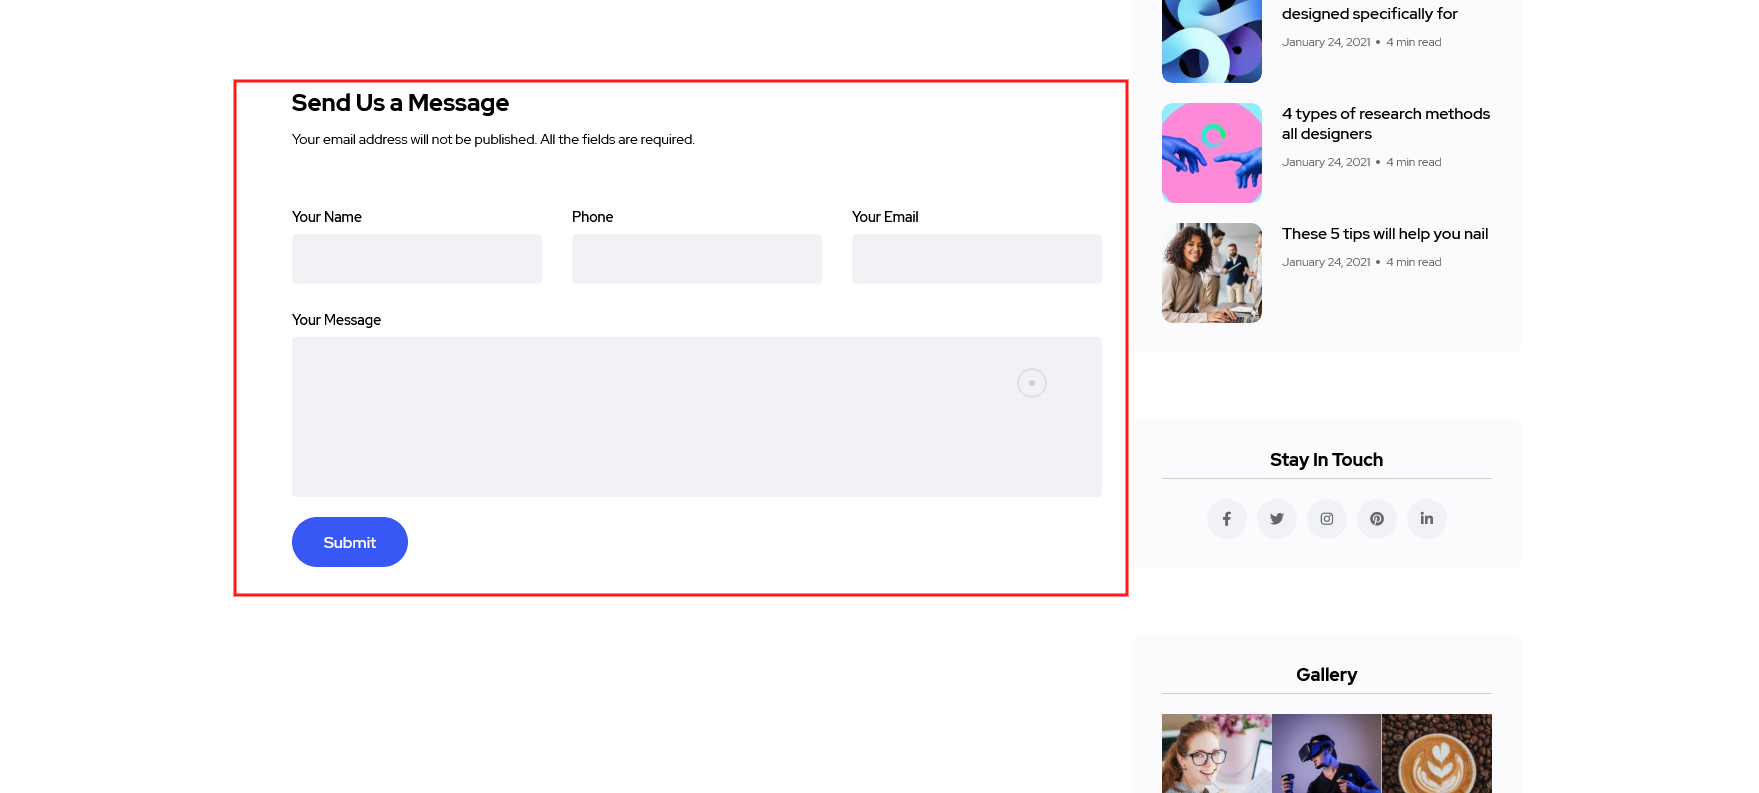
13. Contact Form 7
To customize the contact form visit the official documentation of Contact Form 7: https://contactform7.com/docs/
14. MailChimp for WordPress
To customize the MailChimp for WordPress visit the official documentation of MailChimp for WordPress: https://kb.mc4wp.com/#utm_source=wp-plugin&utm_medium=mailchimp-for-wp&utm_campaign=sidebar

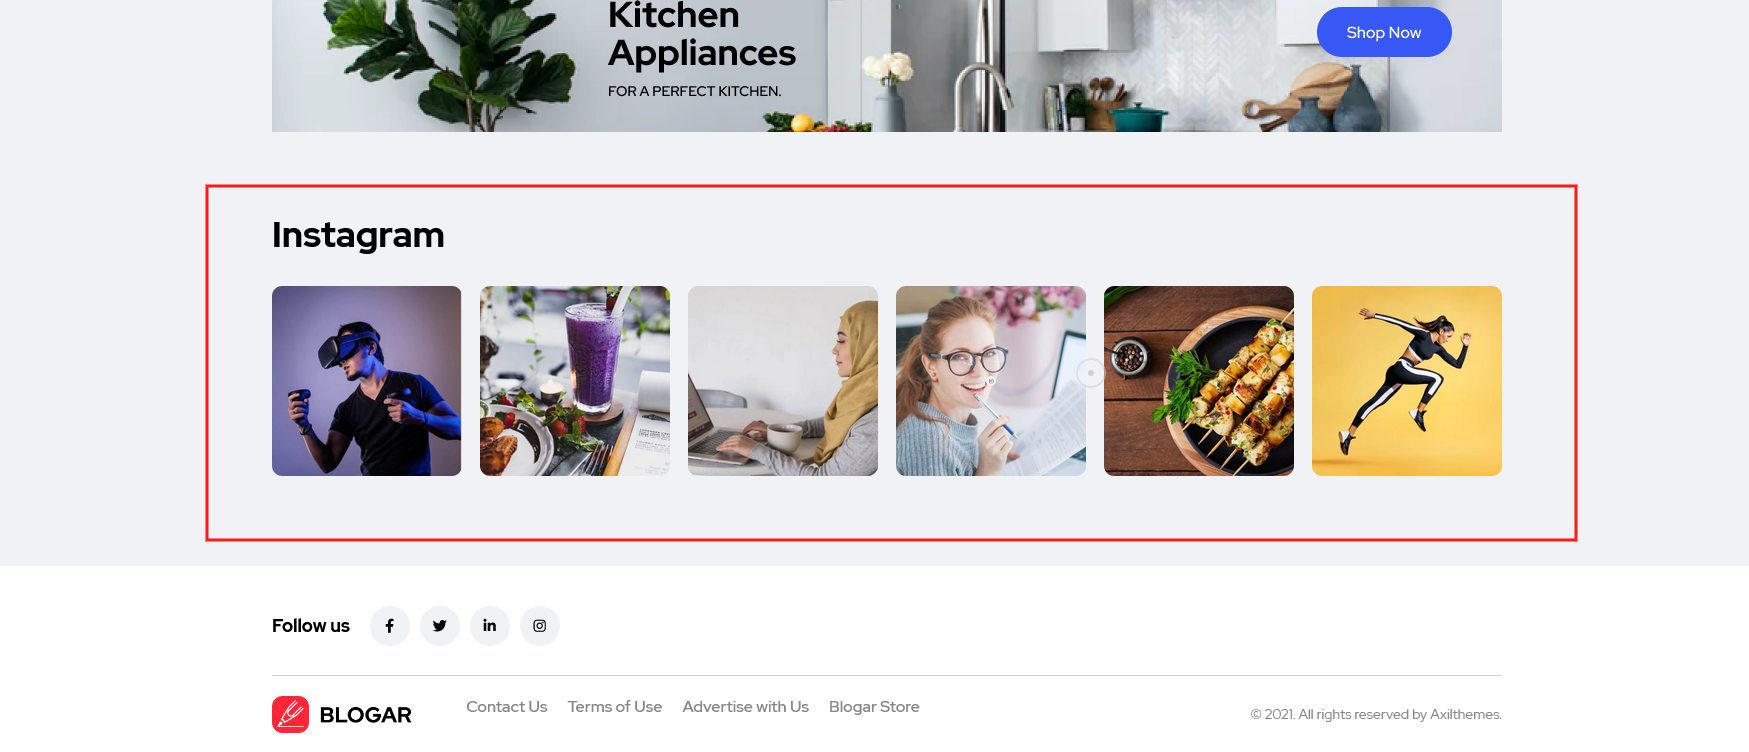
15. Instagram Feed
To customize the Instagram Feed visit the official documentation of Instagram Feed: https://smashballoon.com/instagram-feed/free/